Sunday, December 26, 2010

Bacalhau com Natas (salted cold with cream sauce)


Growing up every year for Christmas Eve our traditional Portuguese dinner was, boiled bacahau, boiled potatoes, and steamed broccoli rabe. While it is a traditional Portuguese dish, it's not one that I'm fond of.

Since getting married and now hosting Christmas Eve each year this is the recipe that I tend to make each year. I tend only to make it once a year because It's loaded with tons of calories, but the way I see it...if you're going to indulge it might as well be during the holidays!

I hope you call enjoy it as much as we do! Happy cooking!

Recipe Adapted from my mother's kitchen

WHAT YOU'LL NEED:
5lbs. salt cod, (thinker pieces are best)
3 large yellow onion, peeled and sliced thin
5 tbsp. olive oil (this is to saute the onions)
5 lbs. potatoes, (peeled and cut into fries)
2 cups milk
8 tbsp unsalted butter
3 tbsp flour
ground pepper to taste
salt to taste
2 cups heavy cream (told you this was loaded with calories)

WHAT YOU'LL NEED TO DO:

Soak the cod in water for 24-48 hours in several changes of cold water.

Drain the cod, rinse, and drain again.

Boil cod, once cooked remove from water and let cool to room temp.

Once cool, remove bones and skin and pull the cod into small shreds, set aside.

In a heavy skillet over low heat, saute the onion in olive oil until soft and golden.

In your deep fryer, fry the potatoes in the oil until they are tender, they do not need to be golden because you will be making them.

As soon as the onions are softly golden, lower heat to the lowest heat, and mix in the cod and 1 cup milk, mix everything together stirring occasionally, for about 10 min.

Melt the butter in a saucepan over moderate heat and blend in the flour, add the remaining milk and heat , stirring constantly , until thickened.

Blend in the pepper and reserve.

preheat the oven to 400.

Take your baking casserole dish and layer have half cod mixture in the bottom.

Take half your fries and layer that on top.

Then take half the cream sauce and pour over the fries.

Repeat the last 3 steps.

Finally pour heavy cream over the top of prepared casserole and top with panko bread crumbs.

Bake uncovered for 30 minutes.

Serve hot.

Saturday, December 25, 2010

Egg and Cheese Souffles


So being that it's Christmas and we have guests today,I wanted to make something different for breakfast. This was so good and everyone loved and came back for seconds. I'll surely be making this again when we have out of town guests. Hope you enjoy it as much as we did!

Happy cooking and Baking!

Adapted from the food network foodnetwork.com/recipes/food-network-kitchens/little-cheese-souffles-recipe/index.html

WHAT YOU'LL NEED:
1 1/2 cups milk (I used skim and it works wonderfully)
3 tablespoons unsalted butter
1/4 cup plus 1 tablespoon all-purpose flour
2 large egg yolks, room temperature
1/4 cup finely grated Parmesan, plus for ramekins
1 teaspoon kosher salt, plus a pinch
Fresh ground pepper to taste
Pinch cayenne pepper
Freshly grated nutmeg
4 large egg whites, room temperature
1 Cup lightly packed coarsely grated full-flavored cheese like Gouda, Gruyere, or Fontina (I used a mixure of all three)
4 (6-ounce) ramekins

Directions

Place a rack in the middle of the oven and preheat to 350 degrees F.

Butter ramekins and sprinkle with Parmesan to lightly coat, tapping out excess.

Put prepared ramekins on a baking sheet and refrigerate.

To make the souffle, Put the milk, and bay leaf in sauce pan and bring the milk and herbs just to a simmer and then pull from the heat.

Melt the butter in a saucepan over medium heat.

Add the flour, and stir constantly with a wooden spoon until the mixture (roux) lightens and foams, about 2 minutes.

Whisk in the warm milk, bring to a boil, and cook, whisking constantly, until the souffle base thickens slightly, about 1 minute.

Remove the herbs and transfer the base to a large bowl and whisk to cool.

Add the egg yolks, the Parmesan cheese, the salt, cayenne, and nutmeg.

Slowly whisk the egg whites in a very clean bowl with lemon juice,

and pinch of salt with a hand-held mixer until foamy.

Increase the speed to high and whip until the whites hold a soft peak.

Quickly, but gently fold 1/4 of the whites into the base with spatula.

Fold in the remaining whites just until streaky, then scatter the grated cheese on top and fold everything together, do not overmix.

Divide the batter among the prepared ramekins, and bake until golden, puffed, and just set in the center, about 30 minutes.

Using an oven mitt or towel, transfer the ramekins to individual plates and serve immediately.

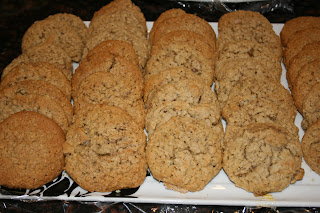
Oatmeal White Raisin Cookies


For Christmas my husband told our son that "Santa" would love some oatmeal raisin cookies, since everyone else leaves him chocolate chip cookies. Can you guess what happened the night of Christmas Eve...when I told Jonathan we had to make cookie for Santa? Well in case you can't guess, my 2 and a half year old started with "Santa NEEDS oatmeal cookies mommy." Luckily I had everything that the recipe called for. But before I realized, that I had everything to bake oatmeal cookies, I faced another dilemma. What was that dilemma you ask...

I had never made a batch of true oatmeal cookies, and being that it was a holiday I wanted a good recipe. I was fortunate enough that Cathy, of (Cathy's kitchen journey) came to my rescue, and was kind enough to share her recipe with me last minute. I have to say they were delicious!

"Santa" said they were the best oatmeal cookies he has ever had. Thanks for sharing Cathy! I hope you all have a wonderful Holiday and a happy and healthy New Year!

Recipe from: mykitchenjourney.blogspot.com

WHAT YOU'LL NEED:

1 cup butter, softened (2 sticks)
1/2 cup white sugar
1 cup packed brown sugar
2 eggs
1 teaspoon vanilla extract (real vanilla please!)
2 cups all-purpose flour
1 teaspoon baking soda
1 teaspoon salt
2 teaspoons ground cinnamon
3 cups quick cooking oats
1 cup raisins (I used white raisins, they are a little sweeter)
1 Tbsp of sugar for dipping

WHAT YOU'LL NEED TO DO:

In a medium bowl, cream together butter, white sugar, and brown sugar.

Beat in eggs one at a time, then stir in vanilla.

Combine flour, baking soda, salt, and cinnamon; stir into the creamed mixture.

Mix in oats and raisins. Cover, and chill dough for at least one hour.

Preheat the oven to 375° F

Line cookie sheets with parchment.

Using a small cookie scoop out dough and place 2 inches apart on cookie sheets.

Flatten each cookie with a large fork dipped in sugar.

Bake for 10 to 12 minutes in preheated oven.

Allow cookies to cool on baking sheet for 5 minutes before transferring to a wire rack to cool completely.

Yield: about 3 and a half dozen!

Monday, December 20, 2010

Ina Sour Cream Coffee Cake


The holidays always seem to bring out my need for baking. This weekend was no exception, the fact that my in-laws were coming for a visit just gave me that added push to bake something. Ideally, I really wanted to bake some type of muffin but after thinking about it for a little,I decided that a coffee cake would be the way to go.

The goal was to bake something to keep on hand so they could have a snack with their tea. I have made the weight watchers recipe and while I like it, and find it to be filling, my husband thought that my in-laws would fine it to be too dense, therefore he recommend I look for another recipe. So now you know the reason I had to look for a new recipe.

So after about an hour of reviewing a few cookbooks without success in finding a recipe, I decided that I would just go onto the food network website and see if I found anything appealing. After about 10 minutes I found the recipe that I was looking for.

INA recipe for a beautiful coffee cake. This cake ended up being the most moist, lite, fluffy cake ever! I must try, I promise, you will not be disappointed. I need make a few adjustments due to the fact that my father-in-law as a mild case of diabetes and I wanted to use less sweeteners even with all the changes the cake was still

WHAT YOU'LL NEED FOR CAKE:
12 tablespoons of unsalted butter at room temperature
1 1/4 cups granulated sugar
3 extra-large eggs at room temperature
1 1/2 teaspoons pure vanilla extract (use real extract)
1 1/4 cups lite sour cream
2 1/2 cups cake flour
2 teaspoons baking powder
1/2 teaspoon baking soda
1/2 teaspoon kosher salt

WHAT YOU'LL NEED FOR THE STREUSEL:
1/4 cup light brown sugar, packed
1/2 cup all-purpose flour
3 teaspoons ground cinnamon
1/4 teaspoon kosher salt
3 tablespoons cold unsalted butter, cut into pieces

WHAT YOU'LL NEED FOR THE GLAZE:
1/2 cup confectioners' sugar
2 tablespoons of water

Directions

Preheat the oven to 350 degrees F. Grease and flour a 10-inch tube pan.

Cream the butter and sugar in the bowl of an electric mixer fitted with the paddle attachment for 4 to 5 minutes, until light.

Add the eggs 1 at a time, then add the vanilla and sour cream.

In a separate bowl, sift together the flour, baking powder, baking soda, and salt.

With the mixer on low, add the flour mixture to the batter until just combined.

Finish stirring with a spatula to be sure the batter is completely mixed.

For the streusel, place the brown sugar, flour, cinnamon, salt, and butter in a bowl and pinch together with your fingers until it forms a crumble.

Spoon half the batter into the pan and spread it out with a knife.

Sprinkle with 3/4 cup streusel.

Spoon the rest of the batter in the pan, spread it out, and scatter the remaining streusel on top.

Bake for 50 to 60 minutes, until a cake tester comes out clean.

Let cool on a wire rack for at least 30 minutes.

Carefully transfer the cake, streusel side up, onto a serving plate.

Whisk the confectioners' sugar and water together, adding a few more drops of water if necessary, to make the glaze runny.

Drizzle as much as you like over the cake with a fork or spoon.

Sunday, December 5, 2010

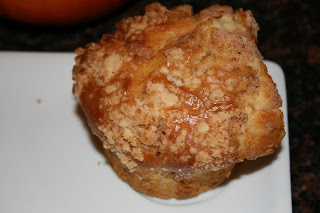
Toddler approved Weight Watcher Blueberry Muffins


The winter months are upon us again, that means longer commutes to work...well if you live in New England you expect to have longer commutes =) With longer commutes it means more time on the road, which means you have to get up earlier...which means you would rather have something that you can just take and eat in the car, or eat once you get to work.

Has you all know by now, I'm always looking for recipes that are lighter, and less fating. Muffins are not an exception I'm always looking do was to make them healthier while still trying to make them taste good. I got this recipe from weight watchers, and I did make a few minor adjusts to this recipe and I'm very happy with the end results. Hope you all like it as much as my toddler and I have.

Happy baking!

WHAT YOU'LL NEED:

2 1/4 cup(s) all-purpose flour,
2 1/2 teaspoons baking powder
3/4 teaspoon salt
1/2 of sugar (I use splenda)
2 large egg whites -- slightly beaten
3/4 cup skim milk
1/3 cup canola oil (I used unsweetened applesauce)
3/4 cup blueberries (I used a little more than 1 cup)
1/2 teaspoon vanilla

Preheat oven to 400 degrees F.

Stir together flour, sugar, baking powder and salt.

Make a well in the center. Set aside.

In a separate bowl, combine the egg, milk, vanilla and applesauce.

Add egg mixture, all at once, to the flour mixture.

Stir until just moistened.

The batter will be lumpy. Stirring all the lumps out will make a tough muffin.

Carefully fold in the blueberries.

Line muffin tin with baking paper cups; fill each 2/3 full.

Bake at 400 degrees F for 20-25 minutes or until golden brown.

Remove from pans.

Calories 158; Fat 6; Fiber 1, 3 Weight Watcher Points

Thanksgiving stuffing 2010


I am always surprised to see how many Foodies are out there. More surprisingly is how many men are foodie as well. As some of you know, I recently changed jobs. I have to admit that the patients I have are too funny and while they are being treated we start talking about currents events. Since Thanksgiving was just a week ago the current event topic of conversations was based on the holidays and where we were going to spend it.

One on my patents is a boy scoots leader (who is actually in the processing of finishing his first cookbook). Every year he does this amazing Thanksgiving fest with his troops for the parents in the middle of the woods. While talking to him, I ended up telling him that I didn't have a good recipe for was stuffing. His response was "I have the most amazing stuffing recipe that I made up, next time I come in I'll bring you the recipe". I not going to lie I was excited to get a new recipe for a side that I haven't had much success with, and from someone who is having his cookbook published was a big deal for me.

The next day when I got to work I started checking my work email, and what's in my inbox but...a new recipe for stuffing. For a minute I wondered how he got my email, then I realized that my work email was on my business cards. Thanksgiving came and I decided that I would give this recipe a try, and I am so happy I did. It came out so good, and even my picky eater mother-in-law liked it.

Thanks Joe for making my Thanksgiving sides a success! FYI this recipe is tailored for a 20 to 25 pound turkey

Recipe source Joe X (sorry no last names due to hippa regulations)

Happy Cooking!


WHAT YOU'LL NEED:

2 lbs. Plain pork sausage browned in olive oil
4 or 5 onions chopped and sautéed
5 celery stalks chopped and sautéed
½ of a fennel bulb chopped and sautéed
½ of a bunch of flat Italian parsley chopped
1 large or 2 small cans of pears in heavy syrup, strained and chopped, discard syrup
2 or 3 fresh apples peeled, cored and chopped
12 ounces of cornbread stuffing
1-14 ounce box of raisins
1-6 ounce package of craisens (dried cranberries)
4 or 6 eggs


WHAT YOU'LL NEED TO DO:

Prepare each of the items as listed.

When everything is done carefully blend all except the eggs in a large bowl and let stand for a couple of hours.

This allows all of the flavors to meld.

Prior baking beat the eggs and carefully blend into the mix.

Put mixture into prepared casserole dish and bake for 30-45 mins until hot.

All that is left to do is enjoy your dinner.

Tuesday, November 30, 2010

Sweet Potato Casserole w/ Marshmallow and Cornflake Topping


I feel like every holiday, my husband likes to add more work to my day. My down fall is I love to cook and try new things so I never say no. This year he asked that I make him a potato casserole. I am not a sweet potato fan so I didn't plan on having it on my meal plan for the day, but since he asked so nicely I couldn't say no.

In my search for the perfect recipe I came across a lot of recipes, but nothing that really make me go that sounds like a great recipe. So I decided that I would take the main ingredients, doctor it up by adding a few ingredients and adding others ingredients so I could tailor it to my husband's likes and dislikes. I also went as far as to change the cooking methods and techniques, I am pleased to say, that I was so happy with the way it came out, and I just had to taste it for myself. Like I said before I am not a fan of sweet potatoes, but this recipe was so good that I actually had a full serving at Thanksgiving.

The fact that I actually enjoyed it means that they recipe had to be pretty amazing. My husband enjoyed it so much that he asked if I could use this recipe on a regular bases. So it appears that it got the seal of approval with the family.

Happy Cooking!

Inspired by the food network kitchen

WHAT YOU'LL NEED:


5 pounds sweet potatoes pealed and cut into large chunks
3 large eggs, lightly beaten
4 tablespoons unsalted butter, melted, plus more for the preparing the pan
4 tablespoons packed dark brown sugar
salt to taste
1 teaspoon ground cinnamon
1 teaspoon ground ginger
1 large pinch of grated nutmeg
Freshly ground black pepper to taste
3/4 heavy cream
about 1 cup of mini Marshmallow
2 cups cornflakes (enough to cover the top of the casserole)

Directions

Preheat the oven to 350 degrees F.

On a large stockpot add water (enough to cover sweet potatoes)

Put the sweet potatoes into boiling water and allow to boil until tender.

Drain from water and set aside to cool.

Scoop the sweet potato into blender and blend until smooth.

Transfer potato puree into a stand mixer and add the eggs, butter, brown sugar, salt, cinnamon, ginger, nutmeg, pepper and heavy cream.

Blend until mixture until smooth.

Butter a casserole dish and pour the sweet potato mixture into the pan.

Then top with a little layer of mini marshmallows, now top that with cornflakes.

Bake until puffed, and cornflakes are browned (about 30 minutes.)

Serve immediately.

Sunday, November 28, 2010

No Bake Ladyfingers Pineapple Cheesecake

If you ask my Husband he will tell you that this is by far the best ladyfingers cheesecake that he has ever had. This recipe is one that my mother would make all the time when I was growing up. When I asked my mother where she got the recipe all she could say is I got it from a family member years ago, and she didn't know where they got it. So unfortunately I can't site it back any further than my mother.

What I can tell you is I have made a few adjustments from how my mother makes it. I hope that you all enjoy this recipe as much as my husband and son do. The look on their faces when I put it on the table on Thanksgiving was priceless. It was the first time I made it and the first time they have had it since my parents moved away almost 23 years ago. I hope you all enjoy this recipe as much as they did.

Happy baking...or in this case happing mixing! And like always if you do make this recipe, I would love to hear your feedback.


WHAT YOU'LL NEED:

3 8oz Packages cream cheese at room temp (I like to use the 1/3 less fat cream cheese)
2 6oz Cartons of heavy cream
1 1/2 Cups of sugar (my mother uses 1 3/4cups) I like to use less because you have the sweetness from the pineapple topping
1 teaspoon of vanilla (like always use the feel good stuff)
2 packages of soft ladyfingers (this could be found at your local store in the bakery section)
1 can of crushed pineapple

WHAT YOU'LL NEED TO DO:

Line the bottom and sides of your spring from.

In your stand mixer add cream cheese, sugar, vanilla. Once combined add in heavy cream and mix for about another 2 minutes until well combined.

At this point you should have a fluffy yet dense mixture (it should not be watery or runny)

Take mixture and pour half into perpared spring form then take remaining ladyfingers and layer over cream cheese mixture.

Once you have layed your ladyfingers, take remaining cream cheese mixture and layer it over the ladyfingers.

Put into the frig for at least 3-4 hours if not over night.

Before serving open can of crushed pineapple and drine juices. Take the drained pineapple and top your cheesecake.

All that is left to do is enjoy!

Sauteed Broccoli Rabe

This is by far the best way I to prepare broccoli rabe. Being that my family isn't the biggest group of corn lovers. I thought that this year for Thanksgiving I would make broccoli rabe. Almost everyone loves fresh in season broccoli rabe so why not pair it with my turkey dinner?

This was super easy and super yummy recipe. Everyone loved it and I had no leftovers which makes me happy. Try this recipe I grantee that you wouldn't be disappointed.


WHAT YOU'LL NEED:

4 bunches (about 1lb each) broccoli rabe with stems trimmed
1/4 cup olive oil
3 garlic cloves, minced
1/2 teaspoon dried crushed red pepper flakes
Salt
Fresh ground pepper
2 tablespoons pine nuts, toasted

WHAT YOU'LL NEED TO DO:

Working in batches, cook the broccoli rabe in a large pot of boiling salted water until crisp tender, about 1 minute per bunch.

Transfer the broccoli rabe to a large bowl of ice water to cool.

Reserve about 1/4 cup of the cooking liquid.

Strain the cooled broccoli rabe and set aside.

Heat the oil in a heavy large skillet over medium heat.

Add the garlic and red pepper flakes, and saute until the garlic is golden, about 1 minute.

Reduce heat to medium-low.

Add the broccoli rabe and toss to coat.

Add the reserved cooking water, and cook until the broccoli rabe is heated through and the stems are tender, about 4 minutes.

Season with salt, fresh pepper to taste.

Just before serving, toss the mixture with the pine nuts.

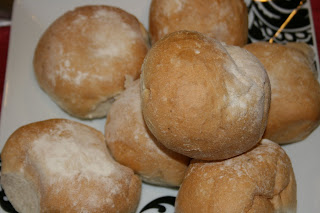
Bobby Flay's Parker House Rolls


Let me draw you a picture...it's Thanksgiving morning and the bakery that I get my bread from is closed. The nearest bakery that I've used and trust is 20 miles away. We are hosting Thanksgiving and neither my husband or I can afford to spend an hour in the car just to go pick up bread. So the only thing left to do is to try baking my own batch.

We don't really eat much bread with dinner, but since we where having a late dinner, my thought was that late afternoon people might get hungry and want to make some mini sandwiches. So I was left with on other choice but to try to bake my very first dinner roll. Yes, I've made a loaf of bread before, but something about working with yeast is intimidating.

Luckily this recipe was easy enough that the end result was terrific. This will surely be a recipe that I use over and over again, especially when we have dinner guests. Hope you all enjoy them as much as I did.

Happy Baking!

Recipe courtesy Bobby Flay


WHAT YOU'LL NEED:

1 1/2 cups milk
1 stick unsalted butter, cut into pieces, plus more for brushing
1/2 cup sugar
1 package active dry yeast
1/2 cup warm water
3 large eggs, lightly beaten
1 1/2 teaspoons salt
6 cups all-purpose flour

WHAT YOU'LL NEED TO DO:

Place milk in a small saucepan and bring to a simmer.

Remove from the heat, stir in the butter and sugar and let cool.

Dissolve yeast in warm water and let sit until foamy. (about 10-15 minutes)

Combine milk mixture, eggs, yeast, salt, and 1/2 of the flour in a mixer with the dough attachment and mix until smooth.

Add the remaining flour, 1/2 cup at a time, and stir until a smooth ball forms.

Remove from the bowl and knead by hand on a floured surface for about 5 minutes.

Place in greased bowl, cover, and let rise in a warm place until doubled in size. (this will take about an hour)

On a floured surface, punch down the dough and shape into desired shapes.

Place on a parchment paper-lined baking sheet.

Dust rolls with flour and cover again and let rise until doubled, (another 30 to 40 minutes.)

Preheat the oven 350 degrees F.

Bake for about 20 minutes or until golden brown.

Remove from the oven and brush with melted butter before serving.

Wednesday, November 24, 2010

How to Cook a Turkey

I tend to make turkey a few times a year, and it seems that around this time every year I'm asked by someone how to cook a turkey. So I thought that this year I would write a post detailing the process so that people could access it before turkey day, or any other day for that matter.

Cooking a turkey without drying out the white meat is a lot simpler than it seems. One must keep in mind that a turkey takes a long while to cook through to the bone. And it is important to remove it from the oven once it reaches 180 degrees. And finally you have to make sure that you roast the bird at a high enough temperature to keep it safe to eat without overcook it.

Allow about 15 minutes of cooking time per pound and about 20 minutes per pound if the bird is cooked with stuffing. So keep this in mind when planning dinner. Determine what time you would like to have dinner and then work backwards to determine the time the turkey needs to go into the oven.

Preheat oven to 325.

Brine your turkey for 24 hours to insure a tender, juicy bird. (Brine recipe to follow in Thanksgiving post)

Place turkey breast side up on a rack in a shallow roasting pan.

Insert meat thermometer in thigh. Add just enough water to over the bottom of pan, (I tend to use the liquid from the brine.)

Cover turkey loosely with a tent of heavy-duty aluminum foil.

Roast the turkey until temperature in the thickest part of the thigh reaches 180°F.

Cooking time will vary. For example, a 20 pound turkey will take 4 1/4 to 5 hours to cook, check the temperature on the thermometer after 4 hours.

Remove the foil tent after 1 to 1 1/2 hours of cooking time to brown the skin.

Brush with vegetable oil or maple syrup to enhance browning

A whole turkey is done when the temperature reaches 180°F.

Do make sure that you don't overcook your turkey you must remove it from the oven once it reaches 180 degrees. Let it rest for about 20 minutes while you get the rest of dinner ready to serve. Once 20 minutes have passed you are able to crave the turkey.

Once it reaches this temperature the thigh juices should run clear when pierced with a fork and the leg should move freely.

It's that simple. Just follow the above steps and you too will have a fully cooked, tender juicy turkey!

Happy Cooking!

Wednesday, November 17, 2010

Turkey, Sausage and Veggie Lasagna


If you believe that the only way to make Lasagna is to use fatty meats then I have news for you! This recipe is by far one of the best lasagnas I have ever had or made for that matter.

By now you all know how I feel about fat and extra calories in my meals. I'm a firm believer that if you substitute a few items you can make any dish taste just as good, as the ones with double the fat content. I promise that the few things that I have done will not compromised the savory taste of the Lasagna.

Besides my obsession with fat and calorie content, the other driving factor behind this recipe is me wanting to incorporate more veggie into my family's diet. Having a 2 and a half year-old who is now starting to develop likes and dislikes, it's becoming harder to get him to eat his veggies. In the recipe I am able to hide the veggies and take comfort in the fact that he is getting enough veggies in his daily intake.

This lasagna to make ahead of time and bake when you are ready to eat it. This is great to make for the late nights at work and is a great dish to bring to a new parent or someone who is recovering from a medical issue. I heats up great and taste fresh for days after baking.

I hope you all enjoy this recipe, and like always...HAPPY COOKING!

WHAT YOU'LL NEED:
1 1/2 pounds ground turkey
1 pound Italian sausage (I like to use turkey sausage)cut into thin slices
1 large onion diced
2 large carrots finely diced
1 green squash finely diced
1 medium size red bell pepper finely chopped
2 cloves garlic, minced
2 teaspoons ground oregano
1 teaspoon ground basil
1/2 teaspoon salt
1/4 teaspoon pepper
1 (14.5-ounce) can diced tomatoes with basil, garlic, and oregano
2 (15-ounce) cans tomato sauce
1 (6-ounce) can tomato paste
1 1/2 cups small cottage cheese
1 (5-ounce) package grated Parmigianno-Reggiano
2 tablespoons freshly chopped parsley leaves
2 large eggs, lightly beaten
oven-ready lasagna noodles
1 (8-ounce) packages shredded mozzarella

WHAT YOU'LL NEED TO DO:

Preheat oven to 350 degrees F.

On outdoor grill out using a stove-top griddle, grill sausages until golden brown.

In a large saucepan, combine ground turkey, veggies, and garlic. Cook over medium heat until meat is browned and crumbled.

Once meat and veggies are cooked make sure to drain the fat and liquids.

Return meat to pan and add oregano, basil, salt and pepper.

Add tomatoes, tomato sauce and tomato paste.

Bring to a boil, reduce heat and simmer 30 to 45 minutes.

In a small bowl, combine cottage cheese, Parmesan, parsley, and eggs.

Spoon 1/4 of sauce into bottom of a 13 by 9 by 2-inch baking pan.

Place row of uncooked lasagna noodles on top of sauce.

Overlapping the noodles just a little.

Spread 1/3 of cottage cheese mixture over noodles and then top with 1/4 of sauce and 1/3 mozzarella cheese.

Repeat layers, ending with sauce, reserving 1/3 of mozzarella cheese.

Bake 45 minutes.

Top with remaining cheese and bake 15 minutes or until hot and bubbly.

Let rest 10 minutes before serving.

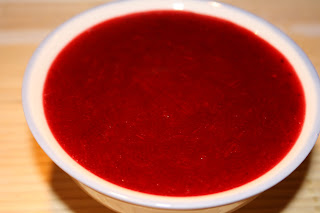
Port Cranberry Sauce


I Love Thanksgiving! Not only because I get to cook, but also because it's all about spending time with the ones you love. I find that other holidays have become so commercialized that we, as consumers are more concerned with finding the perfect gift and we loss sight of what we're celebrating. Thanksgiving in my mind is all about looking back on the passed year and being grateful for everything we have.

I also feel that Thanksgiving is about the traditional foods. How can one have Turkey without the traditional cranberry sauce? Answer...You can't! What pulled me into this recipe is the fact that it calls for Port wine. Being that I'm Portuguese I have tons of bottles of Port wine, I thought I could give this traditional American dish a Portuguese twist, like your truly! =)

This was a great recipe and I will surely make it on Thanksgiving for my guests. I hope you all enjoy it as much as my husband has.

Recipe adapted of Emeril

WHAT YOU'LL NEED:

12 oz cranberries
1 orange, juiced and grated orange zest
1 cup Port
1 cup sugar, (cranberries can be very tart)
1 teaspoon cinnamon
1 tablespoon cornstarch

WHAT YOU'LL NEED TO DO

In a small saucepan combine cranberries, orange juice and zest, port, sugar and cinnamon.

Bring to a boil, reduce heat to simmering and cook until cranberries are tender, stirring occasionally.

Take off heat and puree in blender (if you want whole cranberries in your sauce skip this step) Then return cranberry sauce to heat in saucepan.

In a small cup make a slurry with cornstarch and 1 tablespoon water.

Whisk cornstarch mixture into cranberry sauce and cook, whisking, until sauce thickens.

Let cook and serve with turkey!

Friday, November 12, 2010

Weight Watchers Grilled Red Snapper With Herb Pesto


Let me first start off with saying sorry for the bad picture. My husband wanted to help and he took a picture of the wrong dish and then on top of that he only took one picture. I was actually thinking about not posting this recipe until I made it again, since I wasn't happy with the plating, but then again It was so delicious I couldn't wait to share it with all of you.

Anyway I have to say that this was a really good recipe. I did make a few changed to it because I wasn't a fan of some of the ingredients that they added, and I also grilled it different than the way they recommend. I do have the stove top griddle but I have the smell that fish leaves in the house so I always grill outside.

For people who are not familiar with Red Snapper delicate in flavor, mild, not unlike flounder but not as strong as swordfish. Red Snapper gets it's name from it's skin color not it's meat color so it is nothing like salmon. If you like firm white fish that is flaky then this is the fish for you. I recommend trying it at least once in your life time you will not be disappointed.

Adapted from Weight Watchers

WHAT YOU'LL NEED:

-1/4 cup fresh lemon juice
-1/4 cup dry white wine
-1 lb red snapper fish (if you do not feel comfortable cooking a whole fish then then you could use fillets)
-1 cup packed fresh basil leaves
-1/2 cup packed fresh parsley leaves
-1 Tbs. plus 1 tsp. olive oil
-2 garlic cloves
-1/4 tsp. salt
-Fresh ground black pepper, to taste
-Cooking spray


WHAT YOU'LL NEED TO DO:

To prepare the marinade, in a gallon-size sealable plastic bag, combine the juice, wine and add the fish

Seal the bag, squeezing out air; turn to coat the fish

Refrigerate at least 2 hours or overnight, turning the bag occasionally

Take a sheet of foil (big enough to wrap the fish) and spray foil with nonstick cooking spray

Take the fish and place on prepared foil.

In a food processor blend the basil, parsley, oil, garlic, salt and pepper; puree until smooth.

Preheat grill and then take the pesto paste and spread all over the fish.

Once the fish is coated wrap this dish tight in the foil and place on grill.

If you are doing a whole 1 lb fish on med heat let cook for 15 minutes and then flip and let cook for another 10 mins.

Once cooked Fish should flake nicely with a folk.

Serve along side with your favorite veggies and enjoy!

Nutrition Info: Calories 189, Fat 6g, Saturated Fat 1g, Cholesterol 40 mg, Sodium 284mg, Carbohydrate 7g, Fiber 1g, Protein 24g, Calcium 210mg

Thursday, November 11, 2010

Portuguese Pork and Clams Alentejo-Style


I have to say that this is by far one of my favorite Portuguese meals. I think that that is the best way to describe this dish is to call it a 'Portuguese Surf & Turf'.

Carne à Alenteja is a dish from the southern Alentejo province of Portugal, which is known for it's cooking and great wine selections. The dish is something that is simple to make and would leaving your guests thinking you spent all day in the kitchen. It is a true winner in our home and is something that I will continue making for years to come.

A few things you might want to keep in mind when making this dish is small clams are better since they cook faster and usually taste better. And of course fresh clams are always best.

Also another thing that you might want to do is marinate the pork over night. I think that the meat is more tender and is pack full of flavor. If you do try this recipe please let me know how it comes out. I would love to get some feedback.

Like always Happy cooking!

Adapted from The Portuguese Homestyle Cookbook

Original Recipe Yield 4 to 6 servings


WHAT YOU'LL NEED:
1 1/2 cups dry white wine
1 teaspoon paprika
2 1/2 teaspoons salt
1/4 teaspoon black pepper
4 cloves garlic minced (we like garlic you could use half the amount if you like)
1 bay leaf
2 pounds pork loin, cut into 1 inch cubes
3 teaspoons olive oil, divided
2 onions, peeled and thinly sliced
2 teaspoons finely chopped garlic
2 tomatoes - peeled, seeded and chopped
1/4 teaspoon crushed red pepper flakes
24 small clams in shell, scrubbed
1/4 cup chopped fresh parsley

WHAT YOU'LL NEED TO DO:

In large bowl, combine wine, paprika, salt and pepper, blend well. Add garlic cloves, bay leaf, and cubed meat, turn meat in marinade to coat pieces. Marinate for 6 hours, turning occasionally.

Drain pork; reserve marinade. Pat cubes completely dry. Discard garlic and bay leaf. Melt 1 teaspoon of oil in large skillet.

Add pork cubes, stirring frequently so that the meat colors quickly and evenly. Transfer with slotted spoon to a bowl.

Pour reserved marinade into skillet and bring to a boil over high heat, scraping off any brown particles clinging to the inside of pan.

Boil briskly uncovered until marinade is reduced to 1 cup. Pour over pork and set aside.

In 6 to 8 quart pan, heat remaining 2 teaspoons oil; add onion and cook for 5 minutes, stirring frequently until onion is soft but not brown. Add garlic, tomatoes and crushed red pepper. Simmer, stirring constantly for 5 minutes.

Spread the clams, hinged side down, over the tomato sauce; cover the pan tightly and cook over medium to high heat for ten minutes or until clams open.

Stir in reserved pork and juices. Simmer for 5 minutes to heat thoroughly.

Sprinkle with parsley.

Saturday, November 6, 2010

Mississippi Mud Cupcakes w/ Chocolate Frosting


Ever since I saw Emeril's recipe of Mississippi Mud cake, I've been die to try it. It's been over a year and I just came upon the recipe again. Don't get me wrong cakes are great, but for some reason cupcakes just seem to go faster in my house.

Since the husband and the little man went to visit my in-laws in New York this weekend and since I was unable to sleep. I thought this was the perfect opportunity for me to try my hand at making my own version of Mississippi mud cupcakes. They came out so good, I can't wait to share them with my family tomorrow night after dinner...that is if they last that long.

Hope you enjoy them as much as I am =) Happy baking!

Recipe adapted from Emeril

2 cups all-purpose flour
1 1/2 cups sugar
1 teaspoon baking soda
1/2 teaspoon salt
1/2 pound unsalted butter + extra 2 tablespoons
1/3 cup cocoa powder
1 cup water
1/2 cup buttermilk
2 eggs, lightly beaten
teaspoon vanilla
8 ounces mini marshmallows
1/2 cup of nuts (you can use more or omit all together)
1 Sleeve of chocolate cookie cookies (I like Oreo)

WHAT YOU'LL NEED TO DO:

Preheat the oven to 350F

Take package of chocolate cookies with 2 tablespoon of melted butter and grind in food processor until you get a fine crumb

Line muffin pan with cupcake liners.

In the bottom of each cupcake liner, add some of your cookie crumb to the bottom and likely press down to form the cookie crust.

Then sift the flour, sugar, baking soda and salt into a medium mixing bowl.

Put the butter in a small saucepan and, when melted, add the cocoa and water and bring to a boil.

Add the boiling cocoa mixture to the dry ingredients (flour, sugar, baking soda, salt, mini marshmallows and nuts) and stir until just combined.

Add the buttermilk, eggs, and vanilla and stir until smooth.

Pour equal amount of batter into cupcake liners and bake until a toothpick inserted in the center comes out clean.

This will take between 20-30 minutes depending on your muffin pan. I use a stoneware pampered chef muffin pan so it take about 30 minutes, might take less in a tin one.

Transfer to a wire cooling rack and allow to cool before frosting.

Alton Brown's The Chewy Gluten Free


I never tried making Alton Brown's "the chewy" before, but I have heard so many rave reviews that I wanted to try it first hand and see what the fuss was all about. When searching for the "chewy" I can upon a gluten free version, with all the food allergies I figured that I would try this recipe and see how it came out.

I must say, I was really impressed, they were really big, fully and soft, but my still all time favorite cookie recipe is my other chocolate chip recipe. This one comes in at a close 2nd. I recommend giving them a try you wouldn't be disappointed.

Happy Baking!

Recipe courtesy Alton Brown, 2007

WHAT YOU'LL NEED:

8 ounces unsalted butter
11 ounces brown rice flour, (2 cups)
1 1/4 ounces cornstarch, (1/4 cup)
1/2-ounce tapioca flour, (2 tablespoons)
1 teaspoon xanthan gum
1 teaspoon kosher salt
1 teaspoon baking soda
2 ounces sugar, (1/4 cup)
10 ounces light brown sugar, (1 1/4 cups)
1 whole egg
1 egg yolk
2 tablespoons whole milk
1/2 teaspoons vanilla extract
12 ounces semisweet chocolate chips

WHAT YOU WILL NEED TO DO:

Preheat the oven to 375 degrees F.

Melt the butter in a heavy-bottom medium saucepan over low heat. Once melted, pour into the bowl of a stand mixer.

In a medium bowl, sift together the rice flour, cornstarch, tapioca flour, xantham gum, salt and baking soda. Set aside.

Add both of the sugars to the bowl with the butter and using the paddle attachment, cream together on medium speed for 1 minute.

Add the whole egg, egg yolk, milk and vanilla extract and mix until well combined.

Slowly incorporate the flour mixture until thoroughly combined.

Add the chocolate chips and stir to combine.

Chill the dough in the refrigerator until firm, approximately 1 hour.

Shape the dough into 2-ounce balls and place on parchment-lined baking sheets, 6 cookies per sheet.

Bake for 14 minutes, rotating the pans after 7 minutes for even baking.

Remove from the oven and cool the cookies on the pans for 2 minutes.

Move the cookies to a wire rack and cool completely.

Pour tall glass of chilled milk and enjoy!

Sunday, October 31, 2010

Applesauce Oatmeal Muffins


Wow I can't believe that it's been so long since my last blog update. The passed few months have been crazy, and the kitchen remolding didn't help matters either. Now that things are finally getting back to normal, I'm hoping to blog more frequently, especially now that the holidays seem to be right around the corner.

With that said I just had to share with you all a recipe I found online for applesauce muffins. As most of you know I hate giving Jonathan the same thing all the time so I am always looking for something new to make.

Sometimes in the morning he has a hard time waking up for daycare and seeing that my husband and I are always in a rush to get to work, this is the perfect breakfast to give him in the car on the way to daycare. This recipe is so good, you would never think it was low on calories. The muffins bake up lite, fluffy and moist. didn't change anything ton this recipe because I found the recipe to be perfect the way it was.

Recipe from http://recipes.sparkpeople.com/recipe-detail.asp?recipe=5763

WHAT YOU WILL NEED:

1 cup old fashion rolled oats
1 cup non-fat milk
1 cup whole wheat flour
1/2 cup brown sugar
1/2 cup unsweetened applesauce
2 egg whites
1 tsp. baking powder
1/2 tsp. baking soda
1/2 tsp. salt
2 tsp. cinnamon
1 tsp. sugar

WHAT YOU'LL NEED TO DO:

Soak the oats in milk for about one hour.

Preheat the oven to 400 degrees.

Spray muffin pan with cooking spray or you could do what I do and use liners.

Combine the oat mixture with the applesauce and egg whites, and mix until combined.

In a separate bowl measure and whisk the dry ingredients together.

Add wet ingredients to dry and mix until just combined.

Do not over mix the batter or the muffins will be tough. Spoon muffin mixture into muffin pan.

Combine the cinnamon and sugar and top each muffin with some of the mixture.

Bake for 20-25 minutes or until done.

Remove from pan, cool and enjoy.

Number of Servings: 12

Calories 93.5, Total Fat 0.5 g, Saturated Fat 0.1 g, Cholesterol 0.4 mg, Carbohydrate 20.5 g, Fiber 1.7 g, Sugars 1.4 g,

Thursday, September 16, 2010

Bobby's Flay's Tomato Sauce


Being that it's August and tomatoes are in season this time of year I thought this would be the perfect time to try to make my own sauce. I have to say that I don't regret taking the time to make it.

This is by far the best sauce that I have ever had. The favor in this recipe is out of this world. Another thing that makes this recipe a winner is the fact that it's not watery and becomes a nice think smooth sauce.

I will never go back to using jarred sauce again. Thanks Bobby!

Recipe courtesy Bobby Flay


WHAT YOU WILL NEED:

2 tablespoons olive oil
1 large Spanish onion, finely chopped
4 cloves garlic, smashed with some kosher salt to make a paste
2 (28-ounce) cans plum tomatoes and their juices, pureed in a blender
1 (16-ounce) can crushed tomatoes
1 small can tomato paste
1 bay leaf
1 small bunch Italian parsley
Salt and freshly ground pepper

WHAT YOU WILL NEED TO DO:

Heat olive oil in a medium saucepan over medium heat.

Add onions and garlic and cook until soft.

Add pureed tomatoes with their juices, crushed tomatoes, tomato paste, 1 cup water, bay leaf, parsley, and bring to a boil.

Season, to taste, with salt and pepper.

Reduce heat and cook until slightly thickened, about 30 minutes.

Remove the bay leaf.

Serve hot over pasta of let cool before storing.

Sunday, July 25, 2010

Alton Brown's Cocoa Browines


I have to say, I have never been a fan of Alton Brown, that was until I started watching Good Eats. I have come to love his show, but just because his recipes look good, and easy, but also because unlike some of the other Network stars, he actually explains why you want to use certain ingredients over others. To me that's wonderful because I makes me feel like he wants "us" at home to get the best results possible.

This recipe is so simple and the final product is so good. I don't know about the rest of you, but I could always tell the difference between a boxed brownie and a brownie that was homemade. I moisture, the taste, and even the texture are so much better in a brownie that was made at home. I hope you all give this a try, I know that like myself, you wouldn't be disappointed. Happy Baking!

Recipe Alton Brown:

WHAT YOU'LL NEED:

Soft butter, for greasing the pan
Flour, for dusting the buttered pan
4 large eggs
1 cup sugar, sifted
1 cup brown sugar, sifted
8 ounces melted butter
1/4 cups cocoa, sifted
2 teaspoons vanilla extract
1/2 cup flour, sifted
1/2 teaspoon kosher salt
3/4 cup of chocolate chips (I added this because the person I was making them for is a chocolate lover)

WHAT YOU'RE GOING TO DO:

Preheat the oven to 325 degrees.

Butter and flour an 13x9 pan.

In a mixer fitted with a whisk attachment, beat the eggs at medium speed until fluffy and light yellow.

Add both sugars, and then add remaining ingredients, and mix to combine.

Then with a wooden spoon fold in chocolate chips until well combined

Pour the batter into a greased and floured pan and bake for 45 minutes to an hour, cooking time will vary depending on ones oven and also the pan that you use. (Glass pan and stoneware will take longer to bake).

Check for doneness with a toothpick by inserting toothpick into the center of the pan.

Once the brownies are done the toothpick will come out clean.

When it's done, remove to a rack to cool.

Cut when cool.

Saturday, July 24, 2010

Tie-Dyed Yellow Cupcakes


I work one weekend a month and on the weekends we really don't have time sit down and eat, let alone go out and pick something up. Therefore, on the weekends we tend to do a potluck. This weekend I was in charge of baking something for dessert.

I wanted to make something that was easy and that was fun to look at. Two women that I work with are pregnant, and have been craving cake. So what could be better than baking a batch of yellow cake cupcakes, and then frosting them with a cream cheese frosting and using gels to give it Tie-Dyed affect.

They came out so cute, that I think that I might have to make a batch for the next kids B-day party that we go to. I hope you all enjoy. Happy Baking!

RECIPE INSPIRED BY SANDRA LEE TIE-DYED CUPCAKES

WHAT YOU WILL NEED:

3/4 cup unsalted butter (1 1/2 sticks), at room temperature
1 cup sugar
1 1/2 cups cake flour, sifted
1 1/2 teaspoons baking powder
1/4 teaspoon fine salt
1/2 cup milk, at room temperature (I use 2% milk)
3/4 teaspoon vanilla extract (use the good stuff)
3 large eggs, at room temperature, separated

WHAT YOU WILL NEED TO DO:

Preheat to 375 degrees F.

Line the muffin pan with paper cupcake liners.

In a standing mixer fitted with the paddle attachment, combine the butter and sugar and mix on low speed until just incorporated.

Raise the speed to high and mix until light and fluffy, (this should take about 10 minutes).

In a medium bowl, whisk together the flour, baking powder, and salt and set aside.

In a small bowl, whisk together the milk and vanilla, and set that bowl aside for later.

Add the egg yolks to the creamed butter one at time, waiting for each one to be fully incorporated before adding the next.

Reduce the speed of the mixer to low.

Add the flour mixture in 3 equal portions...allow flour mixture to incorporate well before adding the next portion

Add the milk in 2 additions, waiting for each to be fully incorporated before adding the next

Raise the speed to medium and mix briefly until a smooth batter is formed.

Transfer the batter to a large bowl.

Thoroughly clean the bowl of the mixer and put the egg whites inside.

Whip the egg whites on high speed, using the whisk attachment, until stiff peaks are formed.

Working in 3 batches, using a rubber spatula, fold the egg whites into the batter, until just incorporated.

Divide the batter evenly among the cups in the muffin pan.

Bake, rotating the pan once, until golden brown and a toothpick inserted in the center of the cakes comes out clean, about 30 minutes.

Remove the cakes from the oven and cool completely.

Once cooled frost with cream cheese frosting, or any white frosting of your choice.

Using various gel colors, start in the middle of the cupcake, make circles outwards to the edge of the cupcake

Begin at the edge of the cupcake and drag the tip of a toothpick to the center of the cupcake to make a spider web effect.

Repeat this step, turning cupcake as you go.

Tuesday, July 20, 2010

Tyler Florence's "My Big, Fat Chocolate Chunk Cookies"


OMG! Not only do I love Tyler Florence, but I also love his recipes! Everything that I have ever tried has come out wonderful. The recipe name "MY BIG, FAT CHOCOLATE COOKIES" is an under statement! They are huge! I'm actually thinking that I will use this recipe for Operation Baking Gals next time!

I feel that one of the best things about this recipe is that it's such an easy recipe and the end result it outstanding! I hope you all enjoy this recipe as much as my family and I have. Happy baking!


WHAT YOU WILL NEED:

2 1/2 cups all-purpose flour
1 teaspoon baking soda
1 teaspoon salt
1 cup (2 sticks) unsalted butter, at room temperature
1/2 cup white sugar
3/4 cup packed light brown sugar
1 teaspoon pure vanilla extract
2 large eggs
1 (8-ounce) block dark chocolate, coarsely chopped
3/4 cup of chocolate chips

WHAT YOU WILL NEED TO DO:

Preheat the oven to 350 degrees F.

Line 2 cookie sheets with parchment paper.

Sift together the flour, baking soda, and salt into a medium bowl and set aside.

Place the butter, sugar, and brown sugar in the bowl of an electric mixer; cream together on medium speed until light and fluffy.

Beat in the vanilla and eggs.

Gradually add the dry ingredients to the creamed mixture and continue to mix until a smooth batter forms.

Fold in the chocolate chunks and chocolate chips using a spatula.

Scoop about 1/4 cup of cookie dough into your hands and roll it around into a ball

Place cookies about 3-inches apart onto the prepared cookie sheets

***You will get about 4 cookies on each pan***

Press down the tops of the dough slightly and bake until the cookies are light brown.

Bake for 12 minutes for chewy cookies.
Allow the cookies to cool on the baking sheets for 5 minutes before transferring to a wire rack to cool completely. Repeat with remaining dough/cookie sheets.

Basic Chicken Soup


I don't know if the reason I loved my mother's chicken soup was because it had tons of my favorite veggies or if it was loaded with my favorite pasta... whatever the case may be, as a child nothing was better that my mother's homemade soups. To this day I still feel that she is the best cook/baker ever!

This chicken soup recipe is very basic, but so very yummy. I have found that it's my go to recipe whenever I'm in the mood for (my idea of) comfort good. You get a nice bowl soup that is packed with wonderful flavor without all the guilt that goes with it.

I hope you all enjoy my mother's chicken soup recipe as much as I have over the years. Happy cooking!


WHAT YOU'LL NEED:

2 tablespoons olive oil
1 onion, finely chopped
3 large carrots, chopped into small pieces
2 stalks celery, finely diced
4 cups water
2 cups low sodium chicken stock (I make my own)
2 skinless chicken breasts
a few sprigs of chopped parsley (I think that the parsely really makes the soup flavorful)
1 cup orzo (You can use any kind I prefer to use small pastina stars, letters or orzo but you could use any kind of pasta)
Salt and pepper to taste
1 chicken bouillon

WHAT YOU'LL NEED TO DO:

Begin by heating oil in large heavy pot.

Cook onion and celery until they become translucent.

In another dish, season chicken pieces liberally with salt and pepper and then place chicken in pot and brown, about 5 minutes.

Add carrots and cover with water and chicken stock. Bring to a simmer and cook for 1 hour on low.

Remove chicken from soup and let cool.

Once chicken has cooled, remove meat from bones, shred chicken and return meat to pot and stir in parsley and noodles.

Cook for another 20 minutes.

No mayo Pasta Salad


I hate the fact that a "traditional" pasta salad has to included mayo. In fact it appears that all salads are made with it...potato salad, tuna salad, egg salad and pasta salad. I understand that it's a nice summer side dish, and on hot days people like to have something cold to help cool down, but my question is why must it be covered in fat and extra calories?

I'm always looking to make anything I cook, or bake a little healthier and pasta salad is no exemption. So here is my take on a healthier, less fat pasta salad. My husband and I think it came out great. Hope you enjoy.

Happy cooking!

WHAT YOU WILL NEED:

1 pound of any kind of pasta, cooked, drained (I like bow-tie whole wheat pasta)
1 stalk celery, finely diced
1/2 pepper, finely diced (I prefer red peppers, but I used what I had at home which was a green pepper)
1 small red onion finely chopped
1 cup cherry tomatoes, sliced in half
1 tablespoon Old Bay seasoning
1 tablespoon flaked garlic
Salt, and fresh ground pepper to taste
1/2 to 3/4 cup extra virgin olive oil (enough to cover ingredients)
1/4 cup balsamic vinegar

****NEXT TIME I PLAN ON ADDING 1 CUP OF CHOPPED BROCCOLI.

WHAT YOU WILL HAVE TO DO:

Once pasta is cooked and drained toss back into pot.

Add all your diced veggies, season with bay seasoning, garlic flakes, salt and pepper.

In small blow mix together olive oil and vinegar, then pour into pot.

Mix all ingredients together until everything is combined well.

Put in frig until ready to serve!

All that is left to do is Enjoy your meal!

Wednesday, July 14, 2010

Atlantic Spice Company


Hello everyone, I finally have time to update my blog and share with you all the wonderful new find i came across while I was on vacation in Cape Cod. So to make a long story short. my husband and I went to this cute spice shop which was up the street from where we were staying in North Truro.

Let me tell you walking into this spice shop was walking into heaven! Anyone who loves to cook would fall in love with this place. They had so many wonderful spices, and countless numbers of teas. I could have spent hours just looking at everything. I picked up two large bags full of spices, and it was all very reasonable in price. Not only are the prices great, but the fragrances and quality are out of this world.

Here are a few the wonderful things I picked up on my trip...Cajun seasoning for $4.50/lb, Cinnamon chips 2.95/lb, Cinnamon powder 2.75/lb, Curry powder $4.25/lb, Jamaican jerk seasoning $5.10/lb, Mixed bag of peppercorns under $7/lb one of the most expensive things I picked up was the pink peppercorns and that was $5.30/4oz, but so worth the cost!

The two men at the shop were super friendly, very knowledgeable, and so very helpful. No hard sells needed here, the products speak for themselves. Check out the website and see all this wonderful things that this shop has to offer. (The link to the spice shop is below.) One of the other great things about this place, is that you can order your spices online and have them shipped right to your door within a matter of days. I am now and forever an Atlantic Spice Company customer for life!

www.atlanticspice.com

Tuesday, June 22, 2010

Blueberry Banana Cinnamon Muffins


I believe I have said this a hundred times before...I HATE WASTING FOOD! In an effort to avoid wasting some bananas, I decided that I would just freeze some very ripe bananas I had on hand and just use them at a later date.

I am not a fan of bananas, however both my husband and son seem to really enjoy them. I've found that I have limited knowledge of what to use ripe bananas for, besides from making banana bread, on top of that most of the banana bread recipes I've made, seem to come out very dense. In an effort to avoid an over dense banana bread I decided that I was going try to bake something else.

Then it came to me... my family really enjoy muffins in the morning so why not try to make a banana muffin. So I decided that I would make some banana muffins, but I found myself thinking about what I could add to give it some extra texture and favor, and came up with the Blueberry banana cinnamon muffin.

I hope you all enjoy, and happy baking!

Yields 20 muffins

WHAT YOU'LL NEED:

3 ripe bananas mashed
1 full cup of blueberries (I used frozen ones)
2 eggs
1/2 cup of fat fee plain yogurt or apple sauce (you could use veggie oil, however I don't because I would rather try to keep it less fating)
1/2 cup of milk (I used skim)
2 cups flour
2 teaspoons of baking powder
1/4 teaspoon salt
1 cup sugar
2 tablespoons of cinnamon
1 teaspoon of vanilla

WHAT YOU'LL NEED TO DO:

Preheat oven to 350

In your stand mixer add eggs, yogurt (or apple sauce or veggie oil) milk, and vanilla and allow to mix until everything is well mixed.

Add sugar and allow it to mix well.

Add one cup of flour at a time to mixture until well incorporated.

Add salt and baking powder, and cinnamon allow everything to mix until batter becomes smooth.

Add blueberries and with a wooden spoon mix into batter until they are well incorporated.

Bake for 12-20 minutes depending on your muffin tin or muffin stone or until

Tuesday, June 15, 2010

Cheddar Garlic Biscuits


I can't say much more than I love a good biscuit, every once in awhile. The other day I was craving some biscuits to go along with our chicken dinner. So I looked, and looked and found this Paula Deen recipe that was out of this world.

Jonathan liked it so much that he ended up having two biscuits with his dinner, needless to say, we didn't have too many left over. If your looking for a cheddar garlic biscuit recipe that is a copycat of the ones that you get at Red Lobster then this is the recipe you have been looking for. This is a must try for sure.

Recipe source... http://www.foodnetwork.com/recipes/paula-deen/garlic-cheese-biscuits-recipe/index.html

HAPPY BAKING:

WHAT YOU'LL NEED:

1 1/4 cups biscuit mix
1/2 cup grated sharp Cheddar (I like to use the fat free one)
1/2 cup water
1/2 stick unsalted butter, melted
1/4 teaspoon garlic powder
1/4 teaspoon salt
1/8 teaspoon dried parsley flakes

WHAT YOU'LL NEED:

Preheat the oven to 400 degrees F.

Line a baking sheet with parchment paper.

Combine the biscuit mix and cheese in a small bowl.

Add the water and stir just until combined.

The dough will be slightly moist.

Drop the dough by tablespoonfuls onto the prepared baking sheet.

Bake for about 10 minutes, until the biscuits are firm and beginning to brown.

while the biscuits are baking, make the garlic butter.

In a small bowl, combine the butter, garlic powder, salt, and parsley flakes and mix well.

As soon as you bring the biscuits from the oven, brush them with the garlic butter.

Serve hot!

Cabbage Soup


Let me just say that...I LOVE cabbage soup! As a child I still remember that every week my mother would make a huge pot of soup for the week. Each week she would make a different soup, but every time she made cabbage soup I would skip "main dish" at dinner, and just have a big bowl of soup(or 2) LOL!

Now that I have my own little guy I want to make sure that he too eats the things that I grew up on. This is also a great way for me to ensure that he gets as many veggies as possible into his diet. I hope you all enjoy this as much as my family and I.

HAPPY COOKING!

WHAT YOU'LL NEED:

3 med/large carrots chopped into large chunks
1 med onion chopped into large chunks
4 large russet potatoes chopped into large chunks
1 garlic clove
1 can of red kidney beans
1 med size head of cabbage (I prefer a savoy cabbage)
salt and pepper to taste
2 tablespoons of olive oil
1 chicken bouillon
stock pot filled a little more than half way with water

WHAT YOU'LL NEED TO DO:

Put your stock pot with water on high heat, and carrots, onion, potatoes, kidney beans, garlic, and bouillon.

Once the soup begins to boil being the heat down in a med heat and allow veggies to cook about 20 minutes.

Once the veggies are cooked, remove pot from heat and puree with hand held blender.

After veggies have been pureed you will notice that the soup will have a thick creamy like appearance.

Return soup to stove top let it come to a simmer make sure that you stir the soup so that it does not stick to the bottom of your stock pot.

Once the soup has come to a simmer add your chopped/bite size pieces of cabbage, and olive oil and let cook for an additional 8-10 minutes until cabbage is cooked.

Remove from heat, and let sit for a few minutes.

Enjoy with your favorite bread.

Monday, June 7, 2010

Pad Thai with Chicken


This is a funny story. As many of you already know my husband is Chinese. I always viewed Asian cuisine as being...well nasty...however being married to an Asian man, and being given the opportunity to eat true Asian cuisine, I have learned that this is so far from being true.

The problem was I was eating all the wrong things. I hate to be the one to break the news to everyone, but the "Chinese" food that you get at your local take out joint, is NOT real Chinese food! So all my preconceived notions on what Chinese cuisine really was changed the minute I tried my in-laws cooking.

When I was about 6-7 months pregnant two of my cousins and I wanted to get together before I had my son, and before my cousin Jenn had her daughter. Our cousin Liz suggested going out for Thai food...I was kinda worried that I wouldn't like it, but the more I thought about it, the more open I was to trying something new. I was so HAPPY that I gave it a try.

We went to this little restaurant and the food was amazing! It was so good and I had so much leftover that I brought it home to eat later. Needless to say once my husband saw the leftovers...they didn't last long. About a year ago my husband said that he would like to try making Pad Thai at home. So for months I looked for a recipe and it wasn't until months later that I came across an wonderful recipe that I just needed to try.

Long story short it was really good and we have made it 2 times within the passed 3-4 weeks. I hope you enjoy this recipe as mush as we do.

Recipe adapted from Cooks Illustrated

WHAT YOU'LL NEED:
6-8 ounces stick noodles (I use Nasoya Chinese style noodles)
1/4 cup peanut oil
1/4 cup fish sauce
1/3 cup honey
2 tablespoons rice vinegar
1 teaspoon of Thai Kitchen roasted red chili paste
2 oz Maesri brand Pad-Thai sauce (i use this in place of the tamarid paste and it works great!)
1/2 teaspoon red pepper flakes, (use more it you like it spicy)
1/4 cup chopped scallions
1 garlic clove
3 eggs
1 small head Napa cabbage, shredded
1 cup mung bean sprouts (gives this dish a nice fresh crunch)
1/2 pound skinless boneless chicken breast cut into thin strips
1/3 cup roasted peanuts, chopped (I omitted this)
1/4 cup chopped fresh cilantro
salt to taste

WHAT YOU NEED TO DO:
In stock pot bring water to a boil and add noodles let cook until noodles are tender.

Drain noodles and drizzle with one tablespoon peanut oil to keep from sticking and set aside.

Combine Pad-Thai sauce, roasted red chili paste,fish sauce, honey and vinegar in a small saucepan over medium-low heat and bring just to a simmer. Stir in red pepper flakes and set aside.

Season chicken with salt and set aside until ready to cook.

Use the remaining 3 tablespoons oil in a large skillet over medium-high heat; when oil shimmers, add scallions and garlic and cook for about a minute.

Add eggs to pan; once they begin to set, scramble them until just done.

Add cabbage and bean sprouts and continue to cook until cabbage begins to wilt, then add chicken.

When chicken is fully cooked add noodles to pan along with sauce.

Toss everything together to coat with sauce and combine well.

When noodles are warmed serve, and sprinkling with peanuts and garnishing with cilantro.

Serve hot! All that is left to do is enjoy you meal!

Saturday, June 5, 2010

Whole Wheat Apple Cinnamon Pancakes


Because Jonathan is in daycare it's hard to know if his is eating all his food during the day. By the time we drop him off at daycare he has already missed the morning snack time and doesn't eat again until 11:30, so I want to make sure that he gets a nice big breakfasts in the morning. I love making him homemade waffles and pancakes because it's so easy and most importantly, I'm able to incorporate another serving of fruit into his day.

The funny thing about Jonathan is every morning after he wakes up he says "mommy potty...mommy wash hands...mommy give be breakfast please..." I guess he knows that breakfast in the most important meal of the day! LOL! With all kidding aside, Jonathan loves this recipe because it's naturally sweet, and I love it because it's healthy.

I make a big batch on Sundays and freeze them so each morning all I have to do is take two pancakes out and heat them up, top with some maple syrup, along with a few strawberries and he is ready for the day.

I hope your little ones enjoy this as much as mine does. Happy Cooking!

WHAT YOU'LL NEED:
1 medium Golden Delicious apple, cored and finely diced (about 1 1/2 cups)
3/4 cup whole-wheat flour
3/4 cup all-purpose flour
1/3 cup of organic sugar free apple sauce (I like Motts)
2 teaspoons baking powder
1/2 teaspoon baking soda
1/4 teaspoon salt
2 large eggs
1 cup lowfat buttermilk
3/4 cup lowfat milk
2 tablespoons of cinnamon
2 teaspoons honey
1 teaspoon of vanilla
pinch of salt
Ingredients


WHAT YOU'LL NEED TO DO:

Put the apple in a microwave-proof bowl, tightly cover with plastic wrap and microwave on high until softened, about 2 minutes. Set aside.

In a large bowl, whisk the flours, baking powder, cinnamon, baking soda and salt.

In a small bowl, whisk together the eggs, apple sauce, 1/2 cup of buttermilk, and honey.

Slowly whisk the egg mixture into the dry ingredients, stirring until just combined.

If the batter seems too thick, add as much of the remaining buttermilk as necessary.

Spray a large non-stick griddle with cooking spray and heat over medium heat.

Spoon about 1/4 cup batter per pancake into the pan and top each pancake with a heaping tablespoon of the cooked apple.

Flip when the pancake tops are covered with bubbles and the edges look cooked, about 2 minutes.

Cook until the pancakes are golden brown and cooked through, an additional 1 to 2 minutes.

Serve immediately or transfer the cooked pancakes to an ovenproof dish and keep warm in a preheated 250 degree F oven while making the rest.

Top with powdered sugar, fresh fruits or your favorite syrup. Enjoy and happy cooking!