Saturday, December 8, 2012

Herbed Eggplant Gratin with Creme Fraiche


I think I've said this before, but just in case I didn't I'm in love with Pinterest.  I've found so many different things on that site that it's just amazing.  I've found anything from home decor ideas, to things to do with the kids, to one of my favoriate pass times....COOKING! How can you not love a site that allows you to have everything you need right at your finger tips. 

About a month ago I came across this reciepe and I told myself I would have to try it because eggplant is one of the few veggies that I could get Jonathan to eat without it being WW III.  All you mothers know what I'm talking about, if only they were like that when it came to sweets, but that's a whole other story. 

I have to say that hey Creme Fraiche is what makes this dish.  I personally recommed only using enough of the two sauces to cover the eggplant so it's not dry.  Sometimes I feel that too much sauce really masks the taste of the eggplant and what's the point of eating eggplant if your not going to taste it. 

This really pairs well as a side dish, with meatballs and pasta, or since eggplants are sucha harty veggie, it could even be made into a grinder.  whatever way you go, you will not be disappointed. 
Like always happy cooking and Baking!


/


WHAT YOU'LL NEED:
2 medium to large eggplant, sliced 1/2″ thick
salt & pepper to taste
cooking spray
1 quart simple tomato sauce
3 Tbs. minced chives
3 Tbs. minced parsley
12 oz. creme fraiche
4 oz parmesan cheese, grated

WHAT YOU'LL NEED TO DO:

Preheat oven to 375.
Season eggplant slices with salt and pepper.
Spray and heat a large skillet over med-high heat and fry eggplant slices in batches until golden on both sides.
Set aside while you prepare the creme fraiche.
Place creme fraiche in a small saucepan and bring to a simmer over medium heat.
Let reduce until you have about 1 cup.
Then stir in half of the grated parmesan and all of the chopped herbs and set aside.

Spray a casserole dish and place eggplant inside in a single layer.
Cover with a thin layer of simple tomato sauce and a sprinkle of parmesan.


Make two more layers of eggplant and sauce, covering the top with tomato sauce.
Ladle over the reduced creme fraiche or cream and sprinkle on a final layer of parmesan cheese.


Bake uncovered until browned and bubbling, about 25-30 minutes.
Let rest briefly before serving.


Wednesday, November 28, 2012

Peanut Butter Icebox Pie What's Baking

Here it is....my submission for What's Baking. Our host Kim wanted everyone to submit a pie, which is fitting seeing that the holidays are upon us. You might be wondering why I picked such an easy pie. Well my response is, it's the holidays, I just had a baby, and I was hosting Thanksgiving.  Therefore I needed something that I wouldn't mess up. And in reading this recipe, I knew it was going to be a no fail on my end. I would encourage anyone looking for something easy to try this one, it didn't take more than 15 minutes to make and was a hit.

As you might have noticed, there is not much sugar in the filling. I was a little worried about this, but it was perfect. The Combination of with the cookie crust, caramel and peanut butter cups it is just wonderful and not overly sweet.

If you haven't heard of the Magnolia Bakery Cookbook, you have to pick up copy it's great and has a lot of things that I want to try over the next few weeks.

Also make sure to check out Kim's blog and see her round up which should be up by December 1st. http://justbakedbyme.wordpress.com/


Like always, Happy Baking!

From The Magnolia Bakery Cookbook

WHAT YOU'LL NEED

1 Pie crust
12 Ounces cream cheese, softened
3 Tablespoons sugar
1/2 Teaspoon vanilla
1 Cup heavy cream, whipped to soft peaks
1 Mini peanut butter cups, chopped
3/4 cup smooth peanut butter
1/4 Cup caramel sauce
1/4 Cup chocolate sauce
Handful of chopped mini peanut butter cups

WHAT YOU'LL HAVE TO DO:

Beat cream cheese until fluffy, 2 minutes. Add sugar gradually, then beat in peanut butter and vanilla.

Whip the heavy cream in a separate bowl, then fold gently into the cream cheese mixture.

Fold in the peanut butter cups.

Spread the caramel on the bottom of the crust, then spread the filling over the caramel and smooth the top.

Cover with plastic wrap and chill for at least 3 hours,

Garnish with rest of mini peanut butter cups and drizzle with chocolate sauce.

Sunday, November 18, 2012

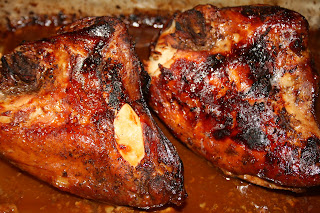
Roasted Chicken In Garlic-Ginger Soy Sauce Marinade

BEFORE:

After being MIA for 3 months looks like I'm trying to make up for lost time. I'm now working on my second post of the day. Well maybe I should say that this is a half recipe as I posted the Marinade earlier today. =)

As my readers know, I love spices, and love to play with them when it comes to making marinades. With that said, this marinade has become my go to recipe due to me having avoid certain foods while breast feeding. No one likes a gassy fussy baby!

I love the favor that this marinade gives the chicken and how easy it is to put together. I tend to use this marinade over night so that my meat comes out favor packed. It could also me used on days that you're lookig to put something together, just marinade for 30 minutes and then bake in marinade.

AFTER:

Hope you all enjoy this as much as my family and I have. Happy cooking and baking!

WHAT YOU'LL NEED:

1/2 cup soy sauce (i use low sodium)
8 cloves garlic, grated,
1 teaspoon of grated ginger
1/4 cup olive oil
2 tsp. freshly ground black pepper
2 bone in chicken breasts

WHAT YOU'LL NEED TO DO:
Take chicken breast apply black pepper and set aside while perparing marinade.
Wisk together soy sauce, garlic, ginger, and olive oil.
Once marinade has come together, drizzle over chicken breast and make sure to turn it until well coated.
Place is frige for at least 30 minutes, or overnight.
Bake at 400 until fully cooked.

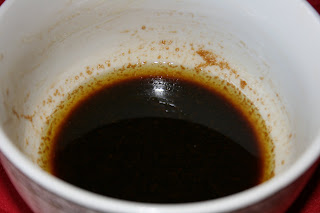
Garlic-Ginger Soy Sauce Marinade


Wow! I can not believe that it's been 3 months since my last "real" food post. Life has been a worldwind, between the promotion at work, having an active 4 year old, and now a newborn, seems like I don't have enough time for anything.

In my head I was telling myself that while home on maternity leave I would have all this time to blog all the new recipes that I would be trying. Boy was I WRONG! While yes, I've been trying new things and taking pictures as I go, I haven't had the time to sit down and blog them. Seems like I'm always getting pulled somewhere else.

Well today I'm home alone with Miss. Emilie so while she naps, mommy is going to try to get a few posts done. Since naps tend to run short in this house, I going to start with a new marinade.


This marinade works with everything from beef, to chicken, even to fish. This is truly a must try marinade. I promise you will not be disappointed. I've tried it on T-bones and today I'm trying it on chicken breasts that I'm roasting for lunch. Can't wait to dig in as it's smelling so good!

Like always happy cookig and baking!

Recipe source: http://www.finecooking.com/recipes

WHAT YOU'LL NEED:
1/2 cup of soy sauce
8 cloves garlic, grated
1 tespoon of grated ginger
1/4 cup olive oil

WHAT YOU'LL NEED TO DO:
Wisk everything together untill well combiened.
Pour over desired protein.
Let marinade for at least 30 minutes, for best results let marinade over night.

Wednesday, October 31, 2012

So...What I've Been Baking Up?

So for this month's What's Baking Challenge Eva from evabakes.blogspot.com, wanted everyone to bake somthing with either sweet potatoes or pumpkin. Unfortunately, I was unable to get my post written up in time for this month's and feel that I should share with you all what's been consuming all my time, and what's I've been taking over my life...that's right! Let me introduce you all to my little pumpkin!


As many of you knew I was expecting my second child this Fall. Emilie Katherine was born on October 3th at 10:53am via c-section weighing in at 6Lbs,14Ozs and 19.5 inches long. Everything went smoothly, and she's healthy. I just trying to adjust to being a mother of 2 while still doing everything else.


I've been cooking and baking up a storm and taking pictures. The only thing is I need to master...finding the time to blog what I've made. So stay tooned as I plan on posting my pumpkin pull apart bread over the next few days, but in the mean time I'll leave you all with a couple of picutres of Jonathan (4 years old) drooling all over his sister. Like always Happy baking to all!

Tuesday, July 31, 2012

Strawberry Muffins


This month's Jaida wanted the what's baking challange to be baking with Summer Fruits. So what did I pick....that's right Strawberry Muffins. Two of my favorite things combined to make the best morning breakfast. I was so tired of the usual coffeecake, and blueberry muffin that I wanted to try something new and luckily enough I still have a some berries that really needed to get used up.

Needless to say this was an amazing recipe and can't wait to try it wimake it again.


WHAT YOU WILL NEED:

1 1/2 cups finely chopped fresh strawberries (frozen one work well too)
1/2 cup white sugar
1/4 cup of white sugar (use in second part of recipe)
1/4 cup butter, softened (either unsalted or salted)
2 eggs
1 teaspoon vanilla extract
1 3/4 cups all-purpose flour
1/2 teaspoon baking soda
1/4 teaspoon salt
1/4 teaspoon ground nutmeg

WHAT YOU WILL NEED TO DO:

In a small bowl, combine the strawberries and 1/2 cup sugar. Set aside for 1 hour.

After an hour Drain, reserving liquid and berries separately.

Preheat the oven to 425 degrees. Line 12 cup muffin tin with paper liners.

In a medium bowl, cream together the butter and 1/4 cup sugar until light and fluffy.

Beat in the eggs one at a time, then stir in the vanilla.

Combine the flour, baking soda, salt and nutmeg; stir into the creamed mixture alternately with the juice from the berries.

Gently stir in the berries. Spoon batter into the prepared muffin cups.

Bake for 18 to 20 minutes in the preheated oven, or until the tops spring back when lightly touched. Cool in the pan on a wire rack.

Nutritional Information for each muffin...Calories 168, Fat 4.9g, Cholesterol 46mg

Monday, May 28, 2012

Homemade Cranberry Apple Granola

So for this month's What's Baking Challenge Ammie from my adventuresinmykitchen wanted everyone to bake with Spring Produce. Unfortunately, my visit over the past few weeks to my local farmer's market have been few and very far in between.

Besides the fact that I am now 22 weeks pregnant, I've also taken on a promotion with work, which has has me doing a lot of traveling over the past few weeks. So of course I wanted to make sure I had a few healthy treats at home while I'm away.

One thing that I know everyone in our home likes is granola. So I baked up another batch before I hit the road yet again this week. Good news is after this week I'll be home for at least the 3-4 weeks!

I Know that cranberries, and apples aren't spring time goods, but at least I could say that I got my apples at the farmer's market that Opened up again this month. =)I'm sure that Ammie will allow me to get away with it...this time.

I hope you all enjoy this recipe as much as my family and I do. Like always happy cooking and baking!

Recipe source: Giada De Laurentis


WHAT YOU'LL NEED: 1/3 cup pumpkin seeds
1/4 cup sunflower seeds
Nonstick cooking spray
1/3 cup maple syrup
2/3 cup packed brown sugar
1/2 cup unsweetened cranberry juice
1 1/2 teaspoons ground cinnamon
3 cups old fashioned rolled oats
1/2 cup sliced almonds
1/4 teaspoon fine sea salt
1 cup dehydrated cranberries
1 cup dehydrated apples

WHAT YOU'LL NEED TO DO: Preheat the oven to 350 degrees F.

Spread the pumpkin seeds and sunflower seeds on a baking sheet. Bake for 8 to 10 minutes until lightly toasted.

Set aside to cool.

Reduce the oven temperature to 325 degrees F.

Spray a baking sheet with nonstick cooking spray. Set aside.

In a small saucepan, combine the maple syrup, brown sugar, cranberry juice, and cinnamon over medium heat.

Cook, stirring constantly, until the sugar has dissolved.

In a medium bowl, mix together the oats, almonds, pumpkin seeds, sunflower seeds, and salt.

Pour the maple mixture over the oat mixture and stir until combined.

Spread the mixture onto the prepared baking sheet.

Bake for 20 minutes.

Remove the baking sheet from the oven.

Stir in the cranberries and apples, and bake for an additional 10 to 15 minutes until the mixture begins to brown.

Cool completely and break apart any large lumps.

Store airtight in a plastic container for up to 1 week.

Saturday, April 21, 2012

Sourdough Bread (What's Baking)

I have to apologize for the fact that I've been MIA. Between being pregnant, and then having a sick child, then a sick husband, and then a sick child again. life seems to have gotten away for my. But just because I didn't post during that time frame doesn't mean I haven't been cooking and baking up a storm. Stay tone for a bunch of blog updates over the next few weeks.

In the meantime, let me start with this month's what baking challenge. This month Lindsay from http://peaceloveandfrenchfries.com/ is our host. Lindsay challenged everyone to bake with YEAST. Yes, yeast I'll admit I've baked with yeast before, but it still intimidates me at times, I don't know why, but it just does.

Lucky for me this time around I had another success! Please make sure to check out Lindsay's blog at the end of the month for a full roundup of what everyone submitted this time around.

Like always...Happy baking!

Recipe source: Allrecipes.com

WHAT YOU'LL NEED:

1 (.25 ounce) package active dry yeast
3 1/2 cups warm water (110 degrees F to 115 degrees F), divided
7 cups all-purpose flour, divided
1/4 cup nonfat dry milk powder
2 tablespoons butter or margarine, melted
2 tablespoons sugar
2 teaspoons salt
Cornmeal
WHAT YOU'LL NEED TO DO:
In a 4-qt. non-metallic bowl, dissolve yeast in 2 cups warm water and let stand for 5 minutes.

Stir in 2 cups of flour until smooth, once combined cover loosely with a clean towel.

Let stand in a warm place (80 degrees F-90 degrees F) to ferment for 48 hours during this period stir several times daily.

The mixture will become bubbly and rise, have a "yeasty" sour aroma and a transparent yellow liquid will form on the top.

Stir in milk powder, butter, sugar, salt, remaining water and enough remaining flour to form a soft dough.

Cover and let rise in a warm place until doubled, about 1-1/2 hours.

Turn onto a floured surface; punch dough down.

Divide in half. Shape each into a round loaf.

Heavily grease a two loaf pans, and sprinkle with cornmeal.

Place dough on prepared pans, cover and allow it rise until doubled. This should take about 30 minutes.

With a sharp knife, make slashes down the middle of each loaf.

Bake at 350 degrees F for 10 minutes.

Brush loaves with cold water; bake 35-40 minutes longer or until golden brown.

Sriracha Chicken

If I could, I would make chicken every day, but that can't happen due to the simple truth that i'm marry to a man that craves variety. =) With that said I still tend to make chicken one a week, and I'm always looking for a new recipe to try. So when I came across this recipe on Pinterest, I just knew I had to try it.

My family enjoyed it every much and it's become one of my husband favorites, so for him to request it, you know it had to be good. I hope you all enjoy this as muchas my family did.
Recipe source Pinterest Feb 2012...(I wish I had saved the link to link it back to, but when I made it I unpinned if from my to try recipes. If I come across the link, I'll make sure to link it back. Sorry!
Like always...Happy Cooking!


WHAT YOU'LL NEED:

4 Boneless, skinless chicken breast
1/2 cup of plain yogurt
2 tbsp olive oil
2 tbsp fresh lemon juice
2 tbsp chopped fresh rosemary
2 tbsp Sriracha
2 cloves garlic
1/2 tsp salt
1/4 tsp pepper

WHAT YOU'LL NEED TO DO:

In a medium bowl, whisk together yogurt, olive oil, lemon juice, rosemary, Sriracha, garlic, salt and pepper.

Place chicken in a large ziploc bag and pour marinade over.

Turn bag over several times to coat chicken. Place in refrigerator and let marinate for at least one hour.

Preheat oven to 375F.

Arrange chicken in a single layer in a baking dish or broiler pan.

Spread any marinade remaining in the bag over chicken.

Bake 35 to 40 minutes, or until chicken is cooked through.

Then broil on high for 4 minutes, until skin is crispy and golden brown.

Friday, March 2, 2012

What's Baking Challenge Roundup! Baking with Valentine's Colors

YA-HOOOOOOO! it's finally my turn to host this month's What's Baking Challenge! I got so many wonderful submission and I can't wait to try them all. Here what everyone baked up for February's baking with Valentine's Colors. Next month's theme is Baking St. Patrick Day treats, which will be hosted by Yudith from http://www.blissfullydelicious.com. Make sure to check back for next months goodies!
And now what you've all been waiting for the roundup! =)

Jen From www.beantownbaker.com submitted these amazing looking Cherry M&M Chocolate Chip Oatmeal Cookies

http://www.beantownbaker.com/2012/02/cherry-m-chocolate-chip-oatmeal-cookies.html

Melissa and her daughter Bella from iwasborntocook.blogspot.com baked up some really cute Valentine's day crayons for Bella's classmates. I can't wait to make this next year with Jonathan! Thanks for sharing Melissa.

http://iwasborntocook.blogspot.com/2012/02/happy-valentines-day-whats-baking.html

Ammie form arkitchenadventures.blogspot.com and I were on the same page this month, while I baked cupcakes,Ammie produced this beautiful red velvet cake with cream cheese frosting!

http://arkitchenadventures.blogspot.com/2012/02/whats-baking-red-velvet-cake-with-cream.html

Jaida from sweetsbeginning.blogspot.com shared with us her heart shaped chocolate raspberry cheesecakes. What a creative was to link it to this month's theme.

http://sweetsbeginning.blogspot.com/2012/02/whats-baking-chocolate-raspberry.html

Carrie from carriessweetlife.com while sick on and off the month of February was still able to baked some really cute Heart shaped Black and White cookies!

http://www.carriessweetlife.com/black-white-heart-cookies/

Yudith from http://www.blissfullydelicious.com shared her version of frosted sugar cookie bars, they look so cute I might have to make them for an upcoming baby shower next month. Thanks Judith

http://www.blissfullydelicious.com/2012/02/frosted-sugar-cookie-bars/

Amanda from ouritaliankitchen.blogspot.com shared her take on a yummy brownie and strawberry trifle

http://ouritaliankitchen.blogspot.com/2012/02/brownie-strawberry-trifle.html

Lindsey peaceloveandfrenchfries.com made cute soft sugar cookies with pink frosting! Perfect timing as I was looking for a new sugar cookie recipe!

http://peaceloveandfrenchfries.com/2012/02/23/soft-frosted-sugar-cookies/

Catherine from wamozart12cooks.blogspot.com baked up some really yummy looking pink grapefruit cupcakes, what a great use of Valentine's Colors.

http://wamozart12cooks.blogspot.com/2012/02/whats-baking-february-valentines-day.html

Nicole from seven8ninebakes.blogspot.com got me excited for her cranberry vanilla chip biscotti! I can't wait to bake up a batch and send them to my father as this is one of his favorite treats paired with his daily espresso.

http://seven8ninebakes.blogspot.com/2012/02/cranberry-vanilla-chip-biscotti.html

Cara from www.theboysmademedoit.com shared frosted sugar cookies which was on her 30 by 30 list. Great job Cara another thing off your list!

http://www.theboysmademedoit.com/2012/02/will-you-be-my-valentine-30-by-30-sugar.html

Heather from http://hezzi-dsbooksandcooks.blogspot.com shared with us her Brown Sugar Blondies made with one of my favorite candies M&M.

http://hezzi-dsbooksandcooks.blogspot.com/2012/02/brown-sugar-blondies-for-valentines-day.html

While Angela from http://tinytyrantskitchen.blogspot.com had trouble with her Valentine's Day treat, she was still able to submit a recipe for Spicy Chocolate Cupcakes.

http://tinytyrantskitchen.blogspot.com/2012/02/spicy-chocolate-cupcakes.html

Jill from http://jbeancuisine.com submitted a roasted beet Risotto...while it wasn't baked, it surely fit the Valentine color theme!

http://jbeancuisine.com/2012/02/20/roasted-beet-risotto-with-goat-cheese/


And last just surely not least! Lindsey from ourshareoftheharvest.com Shared her recipe for chocolate whoopie pies with a strawberry filling! OMG! This is without a doubt the recipe I will use once I'm ready to tackle this in the kitchen.

http://ourshareoftheharvest.com/2012/02/13/whats-baking-chocolate-whoopie-pies-with-strawberry-filling/

Tuesday, February 14, 2012

Red Velvet Cupcakes with Vanilla Bean Frosting


I am so excited...why you might ask, well it's because I'm the host of this month's "what's baking challenge! And seeing that it's Valentine's time again, I wanted to try a new cupcake recipe so I figured why not make a red velvet cupcake to stay with the holiday color theme.


Since Valentine's day lands on a night that I have to work later, I decided that we would celebrate the weekend before. This year I asked my three year old what he wanted to dessert and his response was "I want cupcakes!" Seeing that it was Jonathan's Valentine's Day Dinner as well, how could I say no.

I couldn't have been happier with the way the cupcakes turned out and I can not wait to make them again. Please make sure to come back and check out my what's baking round up and I've already gotten some amazing submission.

Like always happy baking!


Source for Cupcake Paula Deen
Source for Vanilla Bean Frosting http://www.browneyedbaker.com

WHAT YOU'LL NEED:

2 1/2 cups all-purpose flour
1 1/2 cups sugar
1 teaspoon baking soda
1 teaspoon salt
1 teaspoon cocoa powder
1 1/2 cups vegetable oil
1 cup buttermilk, room temperature
2 large eggs, room temperature
2 tablespoons red food coloring
1 teaspoon white distilled vinegar
1 teaspoon vanilla extract

WHAT YOU'LL NEED FOR THE FROSTING:

2½ sticks unsalted butter, softened
1 vanilla bean, halved lengthwise
2½ cups confectioners’ sugar (10 ounces)
Pinch salt
1 teaspoon vanilla extract
2 Tablespoons heavy cream

WHAT YOU'LL NEED TO DO:

Preheat the oven to 350 degrees F. Line muffin pans with cupcake papers.

In a medium mixing bowl, sift together the flour, sugar, baking soda, salt, and cocoa powder.

In another bowl gently beat together the oil, buttermilk, eggs, food coloring, vinegar, and vanilla in stand mixer.

Add the sifted dry ingredients to the wet and mix until smooth and thoroughly combined.

Divide the batter evenly among the cupcake tins about 2/3 filled.

Bake in oven for about 20 minutes, turning the pans once, half way through.

Test the cupcakes with a toothpick for doneness.

Remove from oven and cool completely before frosting.

While the cupcakes cool start making your vanilla bean frosting.

In your stand mixer whisk butter at medium-high speed until smooth.

With the edge of a knife, scrape seeds from vanilla bean into butter and beat mixture at medium-high speed to combine, about 15 seconds.

Once incorporated, add confectioners’ sugar and salt; beat at medium-low speed until most of the sugar is moiste.

Scrape down the bowl and beat at medium speed until mixture is fully incorporated, continue scraping the bowl, add vanilla and heavy cream, and beat at medium speed.

Once everything has come together, increase speed to medium-high and beat until light and fluffy, about 4 minutes, scraping down bowl once or twice.

Once cupcakes are completely cooled, frost cupcakes and Garnish with raspberry, strawberries or even red candies.

Like always, Happy Baking!

Monday, February 13, 2012

Skillet Rosemary Chicken


Have I told you all how much I love Pinterest? Well if I haven't let it be known that It's my new love. I love that fact that I'm able to "pin" (book mark) just about anything and I can come back to it at a later date.

I think that over the past 3-4 months most of my pins have been either decor or food related. Which for me is great because I love the fact that I could get meal ideas from other people. I think that it's so great that I could look at someone's else recipe and it can inspire me to make something new when I find myself in a food funk!

This such a great dish and has made it's way into our meal rotation. If you're looking for sides to go with this, it pairs well with roasted potatoes and a side of veggie such as mushrooms, or green beans. I hope you all enjoy this as much we did.


Like always happy cooking!

Adapted from chimeraobscura.com

WHAT YOU'LL NEED:

2-3 Sprigs fresh rosemary, plus 1 1/2 tablespoons leaves
2 Cloves garlic, minced
Red pepper flakes to taste
Salt and pepper to taste
Juice of 2 lemons (squeezed halves reserved)
2 tablespoons extra-virgin olive oil
6 skin-on, chicken thighs
1/8 Cup of chicken stock
1 Cup of plum tomatoes

WHAT YOU'LL NEED TO DO

Preheat the oven to 450.

Using rosemary leaves, garlic, salt and the red pepper flakes and mash ingredients together to make a paste.

Transfer the paste to a bowl. Stir in the juice of 1 lemon and the olive oil. Add the chicken and turn to coat, and let chicken marinate over night.

30 minutes before starting your meal, take chicken out of frig and set aside.

Heat a large cast-iron skillet over medium-high heat.

Add the chicken, skin-side down, and cook until the skin browns.

Once chicken has browned, drizzle chicken with any marinade remaining in the bowl and the juice of the remaining lemon.

Add the rosemary sprigs, chicken stock, tomatoes, and the squeezed lemon halves to the skillet.

Transfer to the oven and roast, uncovered, until the chicken is cooked through and the skin is crisp, 20 to 25 minutes.

Friday, January 27, 2012

Mini Carrot Cakes


One of my husband's favorite cakes is carrot cake. So when I bake him any type of sweet, I tend to find myself going to a carrot cake or his second favorite, apple cake. He would much rather have a piece of cake over something as sweet as a brownie or ice cream.

Seeing as my husband was on call this during Chinese New Years my in-laws came up and did all the cooking. Since wanted to do all the cooking I decided that I would bake something for dessert. The down side was because they were doing all the cooking, I was in a time crunch and couldn't spend an hour to baking the cake so I decided that I would use this recipe and just bake mini cakes. I have to say that the mini carrot cakes were a huge hit. Not only were the cute, but they also were the perfect size.


WHAT YOU'LL NEED:

6oz Unsalted butter
1 egg at room temperature
1 Tablespoon of water
2 Cups of grated carrots http://tipnut.com/recipes-canning/
1/2 Cup of flour
1 Teaspoon of baking soda
1 Teaspoon of Baking powder
2 Tablespoon of cinnamon
1 Teaspoon of pumpkin spice
1/2 Teaspoon of salt
1 Teaspoon of Vanilla

WHAT YOU'LL NEED TO DO:

Preheat oven to 350 degrees

Grease muffin tin and set aside

In stand mixed, cream the butter, vanilla, and sugar until light and fluffy.

Beat in the egg and water.

Add in carrots, once combined, add in flour, baking soda, baking powder, cinnamon, pumpkin spice, and salt.

Once combined, spoon in the mixture to prepared muffin tin.

Fill to top....as the carrot cakes do not lift a lot.

Bake until the tops spring back when touched lightly for about 35 minutes.

Let stand for 10 minutes before transferring to cooling rack.

Once cool frost with your favorite cream cheese frosting.

Monday, January 23, 2012

Low- fat Mocha Coffee Chocolate Chip Muffins


I don't know about you, but I can not start the day without a cup of coffee. Unfortunately some morning I have to skip that fresh brewed cup of coffee, because I spent an extra 30 minutes trying to get my 3 year old out the door in the morning. You parents know what I'm talking about =)So sometimes our morning start with a grab and go. Well this this grab and go muffin, not only do I get that coffee flavor, but I also get a healthy start to the morning.

We are very big on breakfast,and because of that I'm always looking for something to make on Sundays for the following work week. It has to be easy and something that we can eat on the move. Therefore each week it's either a new twist on pancakes, french toast, croissants, and of course this week's breakfast is MUFFINS!

I have to say that this is such a great recipe and I know it's going to be one that I turn to for years to come. These muffins are so good that half the batch was gone the same day I baked them. I hope you all enjoy it as much as we have.

Recipe: Adapted from Cooking Light Jan 2012 issue

WHAT YOU'LL NEED:

2/3 Cup of 1% milk
4oz of melted butter
1/4 Cup of black coffee
2 Teaspoons of vanilla
1 Egg
2 1/4 Cups of AP flour
2/3 Cup sugar
1/2 Cup Chocolate Chips
2 Teaspoons of baking powder
1 Teaspoon of baking soda
1/4 Teaspoon of salt

WHAT YOU'LL NEED TO DO:

Preheat oven to 400 degrees.

Combine the first five ingredients in stand mixer.

Add sugar and then spoon in Flour into wet mixture until combined.

Add baking powder, baking soda, and salt and beat until combined.

Fold in chocolate chips until just combined.

Spoon batter into greased muffin pan and bake at 400 degrees for about 18-20 minutes, until done.

Remove muffins from pan and let cool on wire rack.

Calories 160, Fat 5.9g Protein 3.6g, Carbs 28g, Fiber 1g,