Wednesday, November 28, 2012

Peanut Butter Icebox Pie What's Baking

Here it is....my submission for What's Baking. Our host Kim wanted everyone to submit a pie, which is fitting seeing that the holidays are upon us. You might be wondering why I picked such an easy pie. Well my response is, it's the holidays, I just had a baby, and I was hosting Thanksgiving.  Therefore I needed something that I wouldn't mess up. And in reading this recipe, I knew it was going to be a no fail on my end. I would encourage anyone looking for something easy to try this one, it didn't take more than 15 minutes to make and was a hit.

As you might have noticed, there is not much sugar in the filling. I was a little worried about this, but it was perfect. The Combination of with the cookie crust, caramel and peanut butter cups it is just wonderful and not overly sweet.

If you haven't heard of the Magnolia Bakery Cookbook, you have to pick up copy it's great and has a lot of things that I want to try over the next few weeks.

Also make sure to check out Kim's blog and see her round up which should be up by December 1st. http://justbakedbyme.wordpress.com/


Like always, Happy Baking!

From The Magnolia Bakery Cookbook

WHAT YOU'LL NEED

1 Pie crust
12 Ounces cream cheese, softened
3 Tablespoons sugar
1/2 Teaspoon vanilla
1 Cup heavy cream, whipped to soft peaks
1 Mini peanut butter cups, chopped
3/4 cup smooth peanut butter
1/4 Cup caramel sauce
1/4 Cup chocolate sauce
Handful of chopped mini peanut butter cups

WHAT YOU'LL HAVE TO DO:

Beat cream cheese until fluffy, 2 minutes. Add sugar gradually, then beat in peanut butter and vanilla.

Whip the heavy cream in a separate bowl, then fold gently into the cream cheese mixture.

Fold in the peanut butter cups.

Spread the caramel on the bottom of the crust, then spread the filling over the caramel and smooth the top.

Cover with plastic wrap and chill for at least 3 hours,

Garnish with rest of mini peanut butter cups and drizzle with chocolate sauce.

Sunday, November 18, 2012

Roasted Chicken In Garlic-Ginger Soy Sauce Marinade

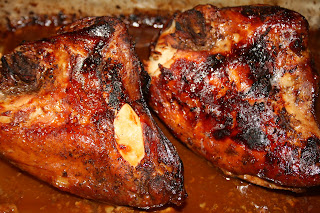
BEFORE:

After being MIA for 3 months looks like I'm trying to make up for lost time. I'm now working on my second post of the day. Well maybe I should say that this is a half recipe as I posted the Marinade earlier today. =)

As my readers know, I love spices, and love to play with them when it comes to making marinades. With that said, this marinade has become my go to recipe due to me having avoid certain foods while breast feeding. No one likes a gassy fussy baby!

I love the favor that this marinade gives the chicken and how easy it is to put together. I tend to use this marinade over night so that my meat comes out favor packed. It could also me used on days that you're lookig to put something together, just marinade for 30 minutes and then bake in marinade.

AFTER:

Hope you all enjoy this as much as my family and I have. Happy cooking and baking!

WHAT YOU'LL NEED:

1/2 cup soy sauce (i use low sodium)
8 cloves garlic, grated,
1 teaspoon of grated ginger
1/4 cup olive oil
2 tsp. freshly ground black pepper
2 bone in chicken breasts

WHAT YOU'LL NEED TO DO:
Take chicken breast apply black pepper and set aside while perparing marinade.
Wisk together soy sauce, garlic, ginger, and olive oil.
Once marinade has come together, drizzle over chicken breast and make sure to turn it until well coated.
Place is frige for at least 30 minutes, or overnight.
Bake at 400 until fully cooked.

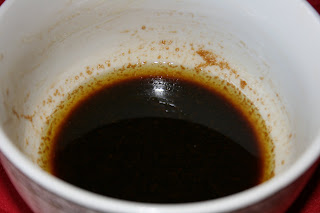
Garlic-Ginger Soy Sauce Marinade


Wow! I can not believe that it's been 3 months since my last "real" food post. Life has been a worldwind, between the promotion at work, having an active 4 year old, and now a newborn, seems like I don't have enough time for anything.

In my head I was telling myself that while home on maternity leave I would have all this time to blog all the new recipes that I would be trying. Boy was I WRONG! While yes, I've been trying new things and taking pictures as I go, I haven't had the time to sit down and blog them. Seems like I'm always getting pulled somewhere else.

Well today I'm home alone with Miss. Emilie so while she naps, mommy is going to try to get a few posts done. Since naps tend to run short in this house, I going to start with a new marinade.


This marinade works with everything from beef, to chicken, even to fish. This is truly a must try marinade. I promise you will not be disappointed. I've tried it on T-bones and today I'm trying it on chicken breasts that I'm roasting for lunch. Can't wait to dig in as it's smelling so good!

Like always happy cookig and baking!

Recipe source: http://www.finecooking.com/recipes

WHAT YOU'LL NEED:
1/2 cup of soy sauce
8 cloves garlic, grated
1 tespoon of grated ginger
1/4 cup olive oil

WHAT YOU'LL NEED TO DO:
Wisk everything together untill well combiened.
Pour over desired protein.
Let marinade for at least 30 minutes, for best results let marinade over night.

Wednesday, October 31, 2012

So...What I've Been Baking Up?

So for this month's What's Baking Challenge Eva from evabakes.blogspot.com, wanted everyone to bake somthing with either sweet potatoes or pumpkin. Unfortunately, I was unable to get my post written up in time for this month's and feel that I should share with you all what's been consuming all my time, and what's I've been taking over my life...that's right! Let me introduce you all to my little pumpkin!


As many of you knew I was expecting my second child this Fall. Emilie Katherine was born on October 3th at 10:53am via c-section weighing in at 6Lbs,14Ozs and 19.5 inches long. Everything went smoothly, and she's healthy. I just trying to adjust to being a mother of 2 while still doing everything else.


I've been cooking and baking up a storm and taking pictures. The only thing is I need to master...finding the time to blog what I've made. So stay tooned as I plan on posting my pumpkin pull apart bread over the next few days, but in the mean time I'll leave you all with a couple of picutres of Jonathan (4 years old) drooling all over his sister. Like always Happy baking to all!

Tuesday, July 31, 2012

Strawberry Muffins


This month's Jaida wanted the what's baking challange to be baking with Summer Fruits. So what did I pick....that's right Strawberry Muffins. Two of my favorite things combined to make the best morning breakfast. I was so tired of the usual coffeecake, and blueberry muffin that I wanted to try something new and luckily enough I still have a some berries that really needed to get used up.

Needless to say this was an amazing recipe and can't wait to try it wimake it again.


WHAT YOU WILL NEED:

1 1/2 cups finely chopped fresh strawberries (frozen one work well too)
1/2 cup white sugar
1/4 cup of white sugar (use in second part of recipe)
1/4 cup butter, softened (either unsalted or salted)
2 eggs
1 teaspoon vanilla extract
1 3/4 cups all-purpose flour
1/2 teaspoon baking soda
1/4 teaspoon salt
1/4 teaspoon ground nutmeg

WHAT YOU WILL NEED TO DO:

In a small bowl, combine the strawberries and 1/2 cup sugar. Set aside for 1 hour.

After an hour Drain, reserving liquid and berries separately.

Preheat the oven to 425 degrees. Line 12 cup muffin tin with paper liners.

In a medium bowl, cream together the butter and 1/4 cup sugar until light and fluffy.

Beat in the eggs one at a time, then stir in the vanilla.

Combine the flour, baking soda, salt and nutmeg; stir into the creamed mixture alternately with the juice from the berries.

Gently stir in the berries. Spoon batter into the prepared muffin cups.

Bake for 18 to 20 minutes in the preheated oven, or until the tops spring back when lightly touched. Cool in the pan on a wire rack.

Nutritional Information for each muffin...Calories 168, Fat 4.9g, Cholesterol 46mg

Monday, May 28, 2012

Homemade Cranberry Apple Granola

So for this month's What's Baking Challenge Ammie from my adventuresinmykitchen wanted everyone to bake with Spring Produce. Unfortunately, my visit over the past few weeks to my local farmer's market have been few and very far in between.

Besides the fact that I am now 22 weeks pregnant, I've also taken on a promotion with work, which has has me doing a lot of traveling over the past few weeks. So of course I wanted to make sure I had a few healthy treats at home while I'm away.

One thing that I know everyone in our home likes is granola. So I baked up another batch before I hit the road yet again this week. Good news is after this week I'll be home for at least the 3-4 weeks!

I Know that cranberries, and apples aren't spring time goods, but at least I could say that I got my apples at the farmer's market that Opened up again this month. =)I'm sure that Ammie will allow me to get away with it...this time.

I hope you all enjoy this recipe as much as my family and I do. Like always happy cooking and baking!

Recipe source: Giada De Laurentis


WHAT YOU'LL NEED: 1/3 cup pumpkin seeds
1/4 cup sunflower seeds
Nonstick cooking spray
1/3 cup maple syrup
2/3 cup packed brown sugar
1/2 cup unsweetened cranberry juice
1 1/2 teaspoons ground cinnamon
3 cups old fashioned rolled oats
1/2 cup sliced almonds
1/4 teaspoon fine sea salt
1 cup dehydrated cranberries
1 cup dehydrated apples

WHAT YOU'LL NEED TO DO: Preheat the oven to 350 degrees F.

Spread the pumpkin seeds and sunflower seeds on a baking sheet. Bake for 8 to 10 minutes until lightly toasted.

Set aside to cool.

Reduce the oven temperature to 325 degrees F.

Spray a baking sheet with nonstick cooking spray. Set aside.

In a small saucepan, combine the maple syrup, brown sugar, cranberry juice, and cinnamon over medium heat.

Cook, stirring constantly, until the sugar has dissolved.

In a medium bowl, mix together the oats, almonds, pumpkin seeds, sunflower seeds, and salt.

Pour the maple mixture over the oat mixture and stir until combined.

Spread the mixture onto the prepared baking sheet.

Bake for 20 minutes.

Remove the baking sheet from the oven.

Stir in the cranberries and apples, and bake for an additional 10 to 15 minutes until the mixture begins to brown.

Cool completely and break apart any large lumps.

Store airtight in a plastic container for up to 1 week.

Saturday, April 21, 2012

Sourdough Bread (What's Baking)

I have to apologize for the fact that I've been MIA. Between being pregnant, and then having a sick child, then a sick husband, and then a sick child again. life seems to have gotten away for my. But just because I didn't post during that time frame doesn't mean I haven't been cooking and baking up a storm. Stay tone for a bunch of blog updates over the next few weeks.

In the meantime, let me start with this month's what baking challenge. This month Lindsay from http://peaceloveandfrenchfries.com/ is our host. Lindsay challenged everyone to bake with YEAST. Yes, yeast I'll admit I've baked with yeast before, but it still intimidates me at times, I don't know why, but it just does.

Lucky for me this time around I had another success! Please make sure to check out Lindsay's blog at the end of the month for a full roundup of what everyone submitted this time around.

Like always...Happy baking!

Recipe source: Allrecipes.com

WHAT YOU'LL NEED:

1 (.25 ounce) package active dry yeast
3 1/2 cups warm water (110 degrees F to 115 degrees F), divided
7 cups all-purpose flour, divided
1/4 cup nonfat dry milk powder
2 tablespoons butter or margarine, melted
2 tablespoons sugar
2 teaspoons salt
Cornmeal
WHAT YOU'LL NEED TO DO:
In a 4-qt. non-metallic bowl, dissolve yeast in 2 cups warm water and let stand for 5 minutes.

Stir in 2 cups of flour until smooth, once combined cover loosely with a clean towel.

Let stand in a warm place (80 degrees F-90 degrees F) to ferment for 48 hours during this period stir several times daily.

The mixture will become bubbly and rise, have a "yeasty" sour aroma and a transparent yellow liquid will form on the top.

Stir in milk powder, butter, sugar, salt, remaining water and enough remaining flour to form a soft dough.

Cover and let rise in a warm place until doubled, about 1-1/2 hours.

Turn onto a floured surface; punch dough down.

Divide in half. Shape each into a round loaf.

Heavily grease a two loaf pans, and sprinkle with cornmeal.

Place dough on prepared pans, cover and allow it rise until doubled. This should take about 30 minutes.

With a sharp knife, make slashes down the middle of each loaf.

Bake at 350 degrees F for 10 minutes.

Brush loaves with cold water; bake 35-40 minutes longer or until golden brown.