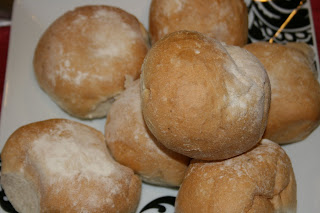
I have to admit Covid-19 has me cooking and baking a lot more. Being home with the kids...who do NOT stopping eating is keeping me busy.
Yesterday was a gloomy day. we had a lot of rain downpours and high winds so we were indoors all day. We spent the day build a fort, and watching movies. It was a really laid back day so dinner followed suit. We ended up build your own pizza, one was cheese and pepperoni and the other was sausage, mushrooms, and ricotta cheese. Both were amazing, not just due to the toppings, but also the crust.
The crust was on point. it mixed well, it stretched out easily and when it finished baking it was crisp. This recipe is a true winner!
Recipe Inspired by Allrecipes; https://www.allrecipes.com/recipe/20171/quick-and-easy-pizza-crust/
WHAT YOU'LL NEED;
1 Tablespoon of active dry yeast
1 Teaspoon of sugar
1 Cup of warm water (not hot water because it will kill the yeast and it will not activate)
1 Teaspoon of salt
2 1/2 Cups of Flour
WHAT YOU'LL NEED TO DO;
Preheat oven to 450
In a medium bowl, dissolve yeast, sugar in warm water.
set aside and allow tt to activate for 10 minutes, it will foam up.
After 10 minutes, in a stand mixer add flour, salt and yeast mixture.
with a hook attachment, beat dough until smooth.
Let dough rest for 20 mintues (you will notice that dough will double in size)
After 20 minutes take the dough and divide in half. *if you like thinker crust then take all the dough and roll out. My family likes thin crust so we are able to make two full size pizzas using this one recipe. (I'll attache pictures of baked pizza below for reference)
Take dough and place it on a lightly floured surface to roll out.
once desired thickness is achieved, transfer crust to lightly greased pizza pan. I will to bake it on a pizza stone.
Add your favorite toppings and bake in preheated oven for 20 minutes, or until golden brown around the crust edges.
Once removed from oven let cool for 5 minutes before serving.
I hope you all enjoy this as much as my family does. Like always happy cooking and baking. Until next time.
My food blog is about the foods that I actually make for my family. My schedule is so crazy that I tend to turn meals that are easy for an active family, all while trying to make healthy choices. And of course you will find an occasional not so healthy meals, or treats but like they say..."everything in moderation!"
Showing posts with label Bread. Show all posts
Tuesday, April 14, 2020
Saturday, January 18, 2014
Cheddar Cheese Beer Bread
When it comes to minimum input and maximum output in the kitchen, beer bread is
about as good as it gets. Five minutes of work rewards you with a heavenly aroma through the house and a warm, crusty loaf in just an hour.
This bread is delicious warm or at room temperature. You can serve it with a side of chilli or even a big bowl of soup, you can even use it to make sandwiches. Another thing you can do, which I've done over the holidays is after it's cooled, you can hollow it out and put a dip in the center and cut up the part that you cut out and us that bread for dipping. And if that wasn't enough, it even freezes beautifully.
There are endless flavor variations of beer bread possible; simply add whatever you desire to the basic dry mix. I did not add any herbs this week because Jonathan is on a "I will not eat anything that it green" kick right now. But just because I didn't add anything doesnt mean that you can't try experimenting with different herbs and beers. A darker beer will give you a deeper flavor.
I have to say that this is easy to make and the flavor profile is amazing. I's still shocked by how few ingredients there are in a basic beer bread. Why pay $10 for a boxed mixed when you can make fresh at home for 1-2 dollars.
Like always happy Baking and i hope you enoy this as much as we do.
WHAT YOU'LL NEED:
Nonstick spray
8 ounces all-purpose flour
4 ounces whole-wheat flour
1 tablespoon baking powder
1 1/2 teaspoons kosher salt
1 teaspoon sugar
4 1/2 ounces sharp Cheddar, grated
12 ounces cold beer,
.
WHAT YOU'LL NEED TO DO:
Remove from the oven and cool in the pan for 10 minutes. Transfer the loaf to a cooling rack for 10 to 15 minutes before slicing and serving.
This bread is delicious warm or at room temperature. You can serve it with a side of chilli or even a big bowl of soup, you can even use it to make sandwiches. Another thing you can do, which I've done over the holidays is after it's cooled, you can hollow it out and put a dip in the center and cut up the part that you cut out and us that bread for dipping. And if that wasn't enough, it even freezes beautifully.
There are endless flavor variations of beer bread possible; simply add whatever you desire to the basic dry mix. I did not add any herbs this week because Jonathan is on a "I will not eat anything that it green" kick right now. But just because I didn't add anything doesnt mean that you can't try experimenting with different herbs and beers. A darker beer will give you a deeper flavor.
I have to say that this is easy to make and the flavor profile is amazing. I's still shocked by how few ingredients there are in a basic beer bread. Why pay $10 for a boxed mixed when you can make fresh at home for 1-2 dollars.
Like always happy Baking and i hope you enoy this as much as we do.
WHAT YOU'LL NEED:
Nonstick spray
8 ounces all-purpose flour
4 ounces whole-wheat flour
1 tablespoon baking powder
1 1/2 teaspoons kosher salt
1 teaspoon sugar
4 1/2 ounces sharp Cheddar, grated
12 ounces cold beer,
.
WHAT YOU'LL NEED TO DO:
- Heat the oven to 375 degrees F. Coat the inside of a 9 by 5-inch loaf pan with the nonstick spray and set aside
- Whisk together the all-purpose flour, wheat flour, baking powder, salt, and sugar in a large mixing bowl.
- Add in the cheese and stir in the beer just to combine. Spread the batter evenly in the prepared pan.
- Bake on the middle rack of the oven until the bread is golden brown and cooked thru. This will take about 50 to 60 minutes.
- Best if served hot.
Remove from the oven and cool in the pan for 10 minutes. Transfer the loaf to a cooling rack for 10 to 15 minutes before slicing and serving.
Labels:
Baked Goods,
Bread,
Game day,
Sides
Saturday, April 21, 2012
Sourdough Bread (What's Baking)
I have to apologize for the fact that I've been MIA. Between being pregnant, and then having a sick child, then a sick husband, and then a sick child again. life seems to have gotten away for my. But just because I didn't post during that time frame doesn't mean I haven't been cooking and baking up a storm. Stay tone for a bunch of blog updates over the next few weeks.
In the meantime, let me start with this month's what baking challenge. This month Lindsay from http://peaceloveandfrenchfries.com/ is our host. Lindsay challenged everyone to bake with YEAST. Yes, yeast I'll admit I've baked with yeast before, but it still intimidates me at times, I don't know why, but it just does.
Lucky for me this time around I had another success! Please make sure to check out Lindsay's blog at the end of the month for a full roundup of what everyone submitted this time around.
Like always...Happy baking!
Recipe source: Allrecipes.com
WHAT YOU'LL NEED:
1 (.25 ounce) package active dry yeast
3 1/2 cups warm water (110 degrees F to 115 degrees F), divided
7 cups all-purpose flour, divided
1/4 cup nonfat dry milk powder
2 tablespoons butter or margarine, melted
2 tablespoons sugar
2 teaspoons salt
Cornmeal
WHAT YOU'LL NEED TO DO:
In a 4-qt. non-metallic bowl, dissolve yeast in 2 cups warm water and let stand for 5 minutes.
Stir in 2 cups of flour until smooth, once combined cover loosely with a clean towel.
Let stand in a warm place (80 degrees F-90 degrees F) to ferment for 48 hours during this period stir several times daily.
The mixture will become bubbly and rise, have a "yeasty" sour aroma and a transparent yellow liquid will form on the top.
Stir in milk powder, butter, sugar, salt, remaining water and enough remaining flour to form a soft dough.
Cover and let rise in a warm place until doubled, about 1-1/2 hours.
Turn onto a floured surface; punch dough down.
Divide in half. Shape each into a round loaf.
Heavily grease a two loaf pans, and sprinkle with cornmeal.
Place dough on prepared pans, cover and allow it rise until doubled. This should take about 30 minutes.
With a sharp knife, make slashes down the middle of each loaf.
Bake at 350 degrees F for 10 minutes.
Brush loaves with cold water; bake 35-40 minutes longer or until golden brown.
In the meantime, let me start with this month's what baking challenge. This month Lindsay from http://peaceloveandfrenchfries.com/ is our host. Lindsay challenged everyone to bake with YEAST. Yes, yeast I'll admit I've baked with yeast before, but it still intimidates me at times, I don't know why, but it just does.
Lucky for me this time around I had another success! Please make sure to check out Lindsay's blog at the end of the month for a full roundup of what everyone submitted this time around.
Like always...Happy baking!
Recipe source: Allrecipes.com
WHAT YOU'LL NEED:
1 (.25 ounce) package active dry yeast
3 1/2 cups warm water (110 degrees F to 115 degrees F), divided
7 cups all-purpose flour, divided
1/4 cup nonfat dry milk powder
2 tablespoons butter or margarine, melted
2 tablespoons sugar
2 teaspoons salt
Cornmeal
WHAT YOU'LL NEED TO DO:
In a 4-qt. non-metallic bowl, dissolve yeast in 2 cups warm water and let stand for 5 minutes.
Stir in 2 cups of flour until smooth, once combined cover loosely with a clean towel.
Let stand in a warm place (80 degrees F-90 degrees F) to ferment for 48 hours during this period stir several times daily.
The mixture will become bubbly and rise, have a "yeasty" sour aroma and a transparent yellow liquid will form on the top.
Stir in milk powder, butter, sugar, salt, remaining water and enough remaining flour to form a soft dough.
Cover and let rise in a warm place until doubled, about 1-1/2 hours.
Turn onto a floured surface; punch dough down.
Divide in half. Shape each into a round loaf.
Heavily grease a two loaf pans, and sprinkle with cornmeal.
Place dough on prepared pans, cover and allow it rise until doubled. This should take about 30 minutes.
With a sharp knife, make slashes down the middle of each loaf.
Bake at 350 degrees F for 10 minutes.
Brush loaves with cold water; bake 35-40 minutes longer or until golden brown.
Labels:
Baked Goods,
Bread,
What's Baking Project
Wednesday, November 30, 2011
Crusty French Boules (Cooking Light)


I have to say that this month's Cooking Light magazine was the best issue yet this year. It had a ton of great recipes that I can't wait to try. One of the best things I found was the French Boules recipe. OK, I know what your thinking..."it can't possibly taste like the real thing!" Well your right it doesn't taste like the "real thing"...it's even better! I kid you not when I say, that this loaf of bread disappears within a matter of a day in my house. My husband who isn't big on bread will take a huge slice, toast it, slap some butter and eats it as a snack.
I think that one of the best things about this bread is that while the crust is crisp and hearty, the inside is light and flavorful. The only down falls is that it takes a few days to prepare. However it truly is well worth the time. I've made this recipe 3 times already and it has now become my go to bread recipe.
If you do try this recipe I would love to here your input, and I hope you all enjoy this recipe as much as my family and I have. Like always happy baking!
WHAT YOU'LL NEED:
For the Pâte fermentée:
1 1/4 cups of AP flour, divided
1/2 teaspoon active dry yeast
1/2 teaspoon salt
1/2 cup warm water (100° to 110°)
Cooking spray
For the dough:
3/4 cup warm water (100° to 110°)
1 teaspoon active dry yeast
2 cups of AP flour
2/3 cup bread flour
1 teaspoon salt
1 tablespoon cornmeal
WHAT YOU WILL NEED TO DO:
Prepare the pâte fermentée, by weighing 1 cup of AP flour into a dry measuring cup, and level with a knife. Combine flour, 1/2 teaspoon yeast, and 1/2 teaspoon salt in the bowl of a stand mixer fitted with paddle attachment.
Add 1/2 cup warm water, and beat at low speed until mixture is thoroughly combined.
Add enough of the remaining 4 tablespoons flour, 1 tablespoon at a time, until dough just begins to pull away from sides of bowl.
Increase mixer speed to medium, and beat for 2 minutes.
Place dough in a small bowl coated with cooking spray.
Place a piece of plastic wrap coated with cooking spray directly on dough. Refrigerate 48 hours or up to 3 days.
Once you're ready to bake your bread, remove pâte fermentée from refrigerator; let stand at room temperature 30 minutes.
Next prepare the dough, by placing 3/4 cup warm water in the bowl of a stand mixer with dough hook attached, and sprinkle with 1 teaspoon yeast.
Let mixture stand for 5 minutes or until bubbles form.
Add pâte fermentée to yeast mixture; let stand 10 minutes.
Spoon 2 cups flour, 2/3 cup of bread flour, and 1 teaspoon salt to bowl; beat at low speed until flour is incorporated.
Increase mixer to medium speed, and beat for 6 minutes. Dough will form a ball.
Place the dough in a large bowl coated with cooking spray; lightly coat dough with cooking spray.
Cover with plastic wrap, and let stand in a warm, dry place, free from drafts, for 1 1/2 hours or until doubled in size.
Punch dough down, and divide into 2 equal portions.
Knead each portion for 1 minute. Shape each dough portion into a 5-inch round by pulling the sides down, pinching and tucking them under the bottom center of dough, forming a smooth, taut surface on the top.
Place dough rounds on a baking sheet sprinkled with cornmeal. Lightly coat surface of dough with cooking spray.
Cover and let rise 1 hour and 15 minutes or until doubled in size.
Place a small ovenproof saucepan with 3 inches of water directly on the floor of oven. Preheat oven to 450°.
Uncover dough. Spray dough lightly with water. Make 4 (4-inch) cuts 1/4 inch deep in dough to form a grid across top of each loaf using a sharp knife.
Bake at 450° for 10 minutes.
Remove water pan from oven.
Bake an additional 15 minutes or until bread is golden brown and sounds hollow when bottom is tapped.
Cool on a wire rack. Cut each boule, crosswise, into 12 slices.
Recipe source Cooking Light NOVEMBER 2011
Serves 24 (1 slice) Calories 82, Fat 0.3 Protein 2.5g CARB 17G, Fiber 0.6g
Tuesday, August 9, 2011
Zucchini Bread
Since we had so many zucchini this year, I had t o find new ways to use them, before they went to waste. Of course having a child that is the "I wouldn't eat that because it's green" stage, I had to find new ways to get certain veggies into his diet. Adding shredded zucchini into the bread makes it easy for me to achieve that goal.
The cool thing about this bread is that the spices in it, make it taste more like a coffee cake bread then an actual zucchini bread. The bread comes out with a nice smooth, moist texture. Something else that I love about this bread is the fact that it freezes well, so you can eat one now and then freeze the second bread for another day. I hope you, and your family all enjoy this as much as we have.
Recipe inspired by Paula's Home Cooking
WHAT YOU'LL NEED:
3 1/4 cups of whole wheat flour
1 1/2 teaspoons salt
1 teaspoon ground nutmeg
1 teaspoon of allspice
2 teaspoons baking soda
2 teaspoon ground cinnamon
2 1/2 cups sugar
1 cup unsweetened apple sauce
4 eggs, beaten
1/3 cup water
2 cups grated zucchini
1 teaspoon lemon juice
WHAT YOU'LL NEED TO DO:
Preheat oven to 350 degrees
In a large bowl, combine flour, salt, nutmeg,all spice baking soda, cinnamon and sugar.
In a separate bowl, combine apple sauce, eggs, water, zucchini and lemon juice.
Mix wet ingredients into dry.
Bake in 2 standard loaf pans, sprayed with nonstick spray.
Bake for 1 hour, or until a tester comes out clean.
Labels:
Baked Goods,
Bread,
Breakfast Foods,
Lite recipes,
Veggies,
What's Baking Project
Sunday, February 6, 2011
Apple Banana Bread
As a mother, I am always trying to get Jonathan to eat more healthy foods. What sucks is my mother-in-law is always giving him crap that I do not approve of for breakfast and snacks. so lately he hasn't been eating his fruits and veggies.
And me being the type of person I am, I'm just not having it! I'll get him to eat his fruits, if it's the last thing I do! LOL! With all joking aside it's very important that Jonathan has a well balanced diet and as his mother, it's my responsibility to insure he gets all the nutrients that he needs.
I've been making banana bread for a while now, and decided that it was about time that I change this up a little, and hence the birth of the apple banana bread was created. I hope you all enjoy this recipe as much as my husband and toddler do.
Happy baking.
Recipe inspired by one of my recent Emeril banana bread recipes.
WHAT YOU'LL NEED:
8 tablespoons of butter
3 medium sized ripe bananas mashed
1/2 cup sour cream (I use lite)
2 tablespoons of half and half (I use fat free)
1 cup of organic unsweetened apple sauce
3 eggs
2 teaspoons vanilla
2 teaspoon of cinnamon
2 cups flour
3/4 cup sugar
1 teaspoon baking soda
3/4 teaspoon baking powder
1/2 teaspoon salt
WHAT YOU'LL NEED TO DO:
Preheat the oven to 350 degrees F.
Lightly grease a 9 1/4 by 5 1/4 by 2 1/2-inch loaf pan with 1 teaspoon of the butter.
Puree the bananas, sour cream, eggs, vanilla, apple sauce, half and half and cinnamon in a food processor.
Sift flour, sugar, cinnamon, baking soda, baking powder, and salt into the bowl of an electric mixer fixed with a whisk attachment.
Add the remaining butter and mix on medium-low speed until blended.
Add the banana mixture in 3 batches, scraping the sides of the bowl and mixing on medium speed between each addition.
Pour into the loaf pan and bake until lightly browned and bread bounces back to the touch. This will take about and 1hour to an 1 and 20 minutes.
Remove from the oven and cool for 10 minutes before turning out onto wire rack to cool completely.
Labels:
Baked Goods,
Bread,
Fruits,
Toddler Menu
Sunday, January 23, 2011
Basic Buttermilk Biscuits
Sunday breakfast is very important in our home. It has become a tradition that we all get up and have a nice big breakfast before we start the day. During the week we are always rushing to get out the door and it's nice to be able to sit down on the weekends and just enjoy the company of your family.
Life is so precious that I think that at times we take it for granted and just say...well we could do this another day, or we can start a new tradition next year. Before we know it, years have passed and our toddlers have grown up and have things that they would rather be doing and they wouldn't appreciate quality time with the family as much.
Due to this, we love and look forward to our Sunday breakfasts. Each week I make something a little different. Last week we had overnight french toast, always a family favorite, but this week I wanted something different. And seeing that my two year old wanted eggs and sausage, I thought I could also make some small biscuits to use up the leftover buttermilk I had.
Breakfast was so good! I know for a fact that Jonathan liked them, he was able to put 3 small ones away with his eggs. =) So long story short this recipe is surely a keeper and I intend adding it to my breakfast rotation. I hope you enjoy it as much as my family and I have.
Happy Baking!
Recipe Source Guy Fieri
WHAT YOU'LL NEED:
1/2 cup unsalted butter, cold, plus 1 tablespoon
1 1/2 cups cake flour
1 3/4 cups all-purpose flour, divided, plus more for work surface
3 teaspoons baking powder
1/2 teaspoon baking soda
1 1/4 teaspoons sea salt, divided
1 cup buttermilk
WHAT YOU'LL NEED TO DO:
Cut 1/2 cup of the butter into 1/2-inch pieces and refrigerate.
In the bowl of a food processor, pulse together the cake flour, 3/4 cup of the all-purpose flour, baking powder, baking soda and 1 teaspoon salt.
Add the butter and pulse to combine, until small crumbles are present.
Add the buttermilk and pulse until a dough ball forms, about 5 to 6 times.
Dust a dry work surface with flour and have the remaining 1 cup ready for kneading.
Turn the dough out onto the floured work surface. With floured hands, gently press the dough out into an 11 by 8-inch rectangle, about 1/4 to 1/2-inch thick, dust lightly with flour and gently fold it over in thirds, like a letter.
Roll or press out to a 6 by 6-inch rectangle again about 2 inches thick.
Cut the dough into 9 squares (2 by 2 inches each) with a pizza cutter.
Transfer the biscuits to a lined baking sheet about 1/2-inch apart.
Cover loosely with plastic wrap and let them rest at room temperature for 15 minutes.
Preheat oven to 500 degrees F. Melt the remaining tablespoon butter and brush tops with melted butter, then sprinkle with the remaining 1/4 teaspoon of sea salt.
Place baking sheet in the middle of the oven and immediately turn oven down to 450 degrees F.
Bake for 12 to 16 minutes until they are golden brown.
Labels:
Bread,
Breakfast Foods,
Guy Fieri,
Toddler Menu
Sunday, January 2, 2011
English Muffin Bread
There is nothing I hate more that to have company (in this case my in-laws, who get up at 5am) wake up before me and then sit around waiting for us to wake up for breakfast. So every time they come and spend a weekend with us, I'm always looking for a recipe that I can make the day/night before so they could have something with their tea in the morning.
This Holiday season was no exception. With all the Holiday sweets, I wanted to make something different and so I made the most wonderful bread. It actually tastes just like an English muffin and and took no time or energy at all to make. This NO-KNEAD bread makes for terrific toast in the morning toast and buttered and you're ready for the morning! I hope you all enjoy it as much as we have.
Happy Baking!
Recipe source Better Homes and Gardens cookbook, Yields 2 loafs
WHAT YOU'LL NEED:
6 Cups of flour
2 Packages of active dry yeast
1/4 Teaspoon of baking soda
2 Cups of milk
1/2 Cup of water
1 Teaspoon sugar
1 Teaspoon salt
Cornmeal
WHAT YOU'LL NEED TO DO:
Grease 2 bread loaf pans, and lightly sprinkle with cornmeal to coat sides and bottom.
Set a side for later.
In a large mixing bowl combine 3 cups of flour, yeast, and baking soda and set aside.
In medium sauce pan heat milk, water, sugar and salt until just warm (until it reaches 120 degrees)
Using a wooden spoon (or stand mixer) stir milk mixture into flour mixture.
Stir in the remaining 3 cups of flour as well.
Once well combined, divide dough in half.
Place dough into prepared pans, and sprinkle the top with more cornmeal.
Cover and let raise in a warm place until doubled in size (this will take about 30-45 mins)
Bake bread in 400 degree preheated oven for 25 minutes until golden brown.
Cool on wire racks.
Nutrition values: 90 cal, 1g fat, 91 mg of sodium, 18 g of carbs, 1 g of fiber, 3 g of protein
Labels:
200 Calorie Meals,
Bread,
Breakfast Foods,
Cookies,
Lite recipes,
Potato
Sunday, November 28, 2010
Bobby Flay's Parker House Rolls
Let me draw you a picture...it's Thanksgiving morning and the bakery that I get my bread from is closed. The nearest bakery that I've used and trust is 20 miles away. We are hosting Thanksgiving and neither my husband or I can afford to spend an hour in the car just to go pick up bread. So the only thing left to do is to try baking my own batch.
We don't really eat much bread with dinner, but since we where having a late dinner, my thought was that late afternoon people might get hungry and want to make some mini sandwiches. So I was left with on other choice but to try to bake my very first dinner roll. Yes, I've made a loaf of bread before, but something about working with yeast is intimidating.
Luckily this recipe was easy enough that the end result was terrific. This will surely be a recipe that I use over and over again, especially when we have dinner guests. Hope you all enjoy them as much as I did.
Happy Baking!
Recipe courtesy Bobby Flay
WHAT YOU'LL NEED:
1 1/2 cups milk
1 stick unsalted butter, cut into pieces, plus more for brushing
1/2 cup sugar
1 package active dry yeast
1/2 cup warm water
3 large eggs, lightly beaten
1 1/2 teaspoons salt
6 cups all-purpose flour
WHAT YOU'LL NEED TO DO:
Place milk in a small saucepan and bring to a simmer.
Remove from the heat, stir in the butter and sugar and let cool.
Dissolve yeast in warm water and let sit until foamy. (about 10-15 minutes)
Combine milk mixture, eggs, yeast, salt, and 1/2 of the flour in a mixer with the dough attachment and mix until smooth.
Add the remaining flour, 1/2 cup at a time, and stir until a smooth ball forms.
Remove from the bowl and knead by hand on a floured surface for about 5 minutes.
Place in greased bowl, cover, and let rise in a warm place until doubled in size. (this will take about an hour)
On a floured surface, punch down the dough and shape into desired shapes.
Place on a parchment paper-lined baking sheet.
Dust rolls with flour and cover again and let rise until doubled, (another 30 to 40 minutes.)
Preheat the oven 350 degrees F.
Bake for about 20 minutes or until golden brown.
Remove from the oven and brush with melted butter before serving.
Labels:
Bobby Flay,
Bread,
Holiday Dishes,
Thanksgiving
Tuesday, June 15, 2010
Cheddar Garlic Biscuits
I can't say much more than I love a good biscuit, every once in awhile. The other day I was craving some biscuits to go along with our chicken dinner. So I looked, and looked and found this Paula Deen recipe that was out of this world.
Jonathan liked it so much that he ended up having two biscuits with his dinner, needless to say, we didn't have too many left over. If your looking for a cheddar garlic biscuit recipe that is a copycat of the ones that you get at Red Lobster then this is the recipe you have been looking for. This is a must try for sure.
Recipe source... http://www.foodnetwork.com/recipes/paula-deen/garlic-cheese-biscuits-recipe/index.html
HAPPY BAKING:
WHAT YOU'LL NEED:
1 1/4 cups biscuit mix
1/2 cup grated sharp Cheddar (I like to use the fat free one)
1/2 cup water
1/2 stick unsalted butter, melted
1/4 teaspoon garlic powder
1/4 teaspoon salt
1/8 teaspoon dried parsley flakes
WHAT YOU'LL NEED:
Preheat the oven to 400 degrees F.
Line a baking sheet with parchment paper.
Combine the biscuit mix and cheese in a small bowl.
Add the water and stir just until combined.
The dough will be slightly moist.
Drop the dough by tablespoonfuls onto the prepared baking sheet.
Bake for about 10 minutes, until the biscuits are firm and beginning to brown.
while the biscuits are baking, make the garlic butter.
In a small bowl, combine the butter, garlic powder, salt, and parsley flakes and mix well.
As soon as you bring the biscuits from the oven, brush them with the garlic butter.
Serve hot!
Saturday, May 22, 2010
Whole Wheat Stuffed Sausage and Broccoli Bread
So today is my bake stuffed bread day... not exactly how I wanted to spend my Saturday but at least I'm making tons of great breads for a friend. Who am I so keep a pregnant women from having the things she craves. LOL!
So while Jonathan was napping I spent my time in the kitchen baking some yummy breads for us to bring over later this afternoon. And I have to confess that I also made an extra one for the house. Jonathan and I have already cut into one and have both and a nice warm piece.
Happy baking everyone!
Recipe for whole wheat dough.... http://sandrafoodblog.blogspot.com/2010/04/whole-wheat-pizza-dough.html
WHAT YOU ARE GOING TO NEED:
1 Homemade whole wheat pizza dough (store bought is fine, but make my own link to the dough recipe above)
3 sausage spicy Italian links
1 medium red onion chopped
1 medium broccoli crown cut into bite size pieces
Olive oil
Garlic salt
Dry basil
WHAT YOU WILL DO:
Preheat oven to 350
Open sausage links and crumble the meat.
In a hot medium saute pan, add crumbled sausage and allow it to brown and cook.
Once sausage it cooked, remove from heat place on paper towel to drain excess fat. Return pan to heat and saute onion.
Once onion is cooked place onions in a small bowl.
Steam broccoli until slightly tender.
While everything cools, take your dough and roll it out into a square.
Once you have rolled out your dough, take the sausage and sprinkle it over the dough, top with onions, and broccoli.
Starting at one end, take the dough and start rolling it onto itself, to create a log.
Place on cookie sheet and let stand for 15 minutes, once 15 minutes have passed brush the top of the bread with olive oil, sprinkle garlic salt and basil.
Place in oven and let bake for about 30 minutes until it becomes golden brown.
Serve with a side of your favorite sauce. Enjoy!
Stuffed Pepperroni and Cheese Bread
At a friends request, today I am spending the afternoon making stuffed breads to bring over to her house for a little get together. Being that she is the host, who am I to say no. =)
Besides not only is this a yummy recipe it takes almost no time at all to put together, which in my book is a huge plus. Hope you all enjoy this recipe as much as we do. Happy baking!
Pizza dough recipe courtesy Tyler Florence, the rest of the recipe is an original. link to dough recipe below
http://www.foodnetwork.com/recipes/tyler-florence/fresh-pizza-dough-recipe/index.html
WHAT YOU ARE GOING TO NEED:
1 Homemade pizza dough (store bought is fine, but I use Tyler Florance's recipe link to pizza dough above)
1/4 lb of pizza size pepperoni
2-3 cloves of garlic minced
1/2 cup of shredded mozzarella
Olive oil
Dry basil
WHAT YOU WILL DO:
Preheat oven to 350
Take your dough and roll it out into a square.
Once you have rolled out your dough, take the pepperoni and cover the dough with slices.
Take the garlic and sprinkle over the pepperoni and the top with shredded cheese.
Starting at one end, take the dough and start rolling it onto itself, to create a log.
Place on cookie sheet and let stand for 15 minutes, once 15 minutes have passed brush the top of the bread with olive oil, sprinkle garlic salt and basil.
Place in oven and let bake for about 30 minutes until it becomes a lite golden brown.
Serve with a side of your favorite sauce. Enjoy!
Sunday, May 2, 2010
Stuffed Sausage Bread
So why stuffed sausage bread you might wonder, well it's simple...My husband is not a huge fan of pizza, however he will eat homemade pizza and enjoy it, as long as I not make it every week and I change up the pizza toppings.
The plan for this week was I was going to make sausage and turkey meatball pizza...I mean that was the plan until my husband informed me that he had pizza two times that week at work. So now I thinking, I have dough that is going to go bad, what else can I do with it... then it came to me why not make a stuffed bread and that is exactly what I ended up doing. Needless to say it came out really good and my husband and son both enjoyed it.
Pizza dough recipe courtesy Tyler Florence, the rest of the recipe is an original. link to dough recipe below
http://www.foodnetwork.com/recipes/tyler-florence/fresh-pizza-dough-recipe/index.html
WHAT YOU ARE GOING TO NEED:
1 Homemade pizza dough (store bought is fine, but I use Tyler Florance's recipe link to pizza dough above)
3 sausage spicy Italian links
1 medium red onion chopped
2-3 medium ALREADY COOKED meatballs sliced thin (I like turkey meat for this)
Olive oil
Garlic salt
Dry basil
WHAT YOU WILL DO:
Preheat oven to 350
Open sausage links and crumble the meat.
In a hot medium saute pan, add crumbled sausage and allow it to brown and cook.
Once sausage it cooked, remove from heat place on paper towel to drain excess fat. Return pan to heat and saute onion.
Once onion is cooked place onions in a small bowl.
While everything cools, take your dough and roll it out into a square.
Once you have rolled out your dough, take the sausage and sprinkle it over the dough, top with onions, and then sliced meatballs.
Starting at one end, take the dough and start rolling it onto itself, to create a log.
Place on cookie sheet and let stand for 15 minutes, once 15 minutes have passed brush the top of the bread with olive oil, sprinkle garlic salt and basil.
Place in oven and let bake for about 30 minutes until it becomes a lite golden brown.
Serve with a side of your favorite sauce. Enjoy!
Saturday, May 1, 2010
Tyler Florence's Pizza Dough
So not only am I in love with Tyler Florence, but I'm also in love with all his recipes. I am yet to make one of his recipe and be disappointed. This all leads me to wonder, how his wife stays so thin. LOL!
Anyway I have always hated working with yeast, but this recipe is so simple it's hard to mess up. You would really need to work hard to mess it up. Even my friends that "don't cook or bake" love this recipe and use it to make homemade pizza and stuffed breads.
I love the fact that this recipe yields two doughs. It's so nice to be able to use one now and safe the other for another day. Hope you enjoy it, and happy baking!
Makes enough dough for 2-15 inch pizzas
Recipe courtesy Tyler Florence link to recipe below
http://www.foodnetwork.com/recipes/tyler-florence/fresh-pizza-dough-recipe/index.html
WHAT YOU WILL NEED:
2 packages active dry yeast
2 teaspoons sugar
2 cups warm water (100 to 110 degrees F.)
1 tablespoons kosher salt (original recipe calls for 2 tablespoons but i find it to be too salty)
6 cups unbleached all-purpose flour, plus more for dusting
2 tablespoons extra-virgin olive oil, plus extra for bowl
WHAT YOU WILL NEED TO DO:
In a small bowl, combine the yeast, sugar and water and stir gently to dissolve.
Let the mixture stand until the yeast comes alive and starts to foam, 5 to 10 minutes.
Combine the salt and flour in stand mixer and pulse a few times to mix.
Add the yeast mixture, at the lowest speed, until the flour incorporates.
When the dough starts to come together, increase the speed to medium and mix until the dough gathers into a ball.
This should take about 2 minutes.
Add the olive oil and pulse a few more times. Stop the machine periodically to scrape the dough off the hook.
Get a feel for the dough as you're making it by squeezing a small amount together between your thumb and fingers. If it's crumbly, add more water, if it's sticky, add more flour, 1 tablespoon at a time.
Turn the dough out onto a lightly floured surface and fold it over itself a few times, kneading until it's smooth and elastic.
Form the dough into a round and put it into a lightly oiled bowl, turning it over to coat the dough entirely with the oil.
Cover with plastic wrap or a damp towel and let it rise in a warm spot until it doubles in size, about 1 hour
Tuesday, April 13, 2010
Whole Wheat Pizza Dough
Store bought pizza dough is always great for last minute, but I think that if you're taking the time to make homemade pizza, then you should also try to make the dough. It's really not hard and it doesn't take much time.
Not only is this recipe healthier because it's make with whole wheat, but I actually think that this dough is a million time better than the store bought one. Truthfully I think that you should try to make your own pizza dough at least once.
Happy Baking!
Recipe yields one pizza crust. I wish I could site the source of this recipe, but to be honest I've been using it for years now, and for the life of me I can't remember where I got it from. So sorry I can't link it to the cite for you today.
WHAT YOU WILL NEED:
1 (.25 ounce) package active dry yeast
1 cup warm water
2 cups whole wheat flour
1/4 cup wheat germ
1 teaspoon salt
1 tablespoon honey
WHAT YOU WILL NEED TO DO:
Preheat oven to 350 degrees F
In a small bowl, dissolve yeast in warm water. Let stand until creamy, about 10 minutes.
In a large bowl combine flour, wheat germ and salt. Make a well in the middle and add honey and yeast mixture.
Stir well to combine. Cover and set in a warm place to rise for a few minutes.
Roll dough on a floured pizza pan (I like to use a pampered chef pizza stone.)
Poke a few holes in dough using a fork.
Top with your favorite toppings and then bake in preheated oven for about 20-25 depending on how crispy you want your crust .
Nutritional Information per serving (just for pizza dough) Calories: 83, Total Fat: 0.6g, Cholesterol 0mg
Labels:
200 Calorie Meals,
Baked Goods,
Bread,
Lite recipes
Saturday, February 27, 2010
Whole Wheat Focaccia Bread
Let me just say, if I had to eat one thing for the rest of my life, I truly believe that it would be bread. Maybe it's because I'm Portuguese, maybe it just because I love carbs. Unfortunately carbs don't seem to love us back. White flour is evil. So why not try to have the bread, without having the guilt of white flour.
This recipe was so good that my family eat half in one night. This Focaccia bread is similar to pizza, only major difference is that focaccia bread tends to be thicker than pizza. I truly think this bread is a wonderful, and quick alternative to garlic bread. Lots of herbs and lots of flavor! I will for sure continue to make this recipe, and I hope you do to.
Inspired by Peter Reinhart's "Whole Grain Breads" cookbook.
Recipe Yield 1 focaccia
WHAT YOU WILL NEED:
2 3/4 cups whole wheat flour
1 teaspoon salt
1 teaspoon white sugar
1 tablespoon active dry yeast
4-6 large cloves of garlic minced (if you have a garlic press this would be great)
1 teaspoon garlic powder
1 teaspoon dried oregano
1/2 teaspoon dried rosemary
1/2 teaspoon dried basil
1 pinch ground black pepper
1 tablespoon vegetable oil
1 cup water
3 tablespoons olive oil
1 tablespoon grated Parmesan cheese
WHAT YOU WILL NEED TO DO:
In a large bowl, stir together the flour, sugar, yeast, and black pepper. Mix in the vegetable oil and water. (This is best done in a stand mixer with the dough hook.)
When the dough has pulled together, turn it out onto a lightly floured surface, and knead until smooth and elastic.
Lightly oil a large bowl, place the dough in the bowl, and turn to coat with oil.
Cover with a damp cloth, and let rise in a warm place for 20 minutes.
Preheat oven to 450 degrees.
Punch dough down; place on greased baking sheet. Pat into a 1/2 inch thick rectangle. Brush top with olive oil.
Sprinkle with salt,garlic powder, oregano, basil,Parmesan, minced garlic, and cheese
Bake in preheated oven for 15 minutes, or until golden brown. Serve warm.
Sunday, January 24, 2010
Yummy Bread!
So baking bread has never been something that I have been good at. The only time I have ever baked bread was with my mother, and being that she lives in Europe I have to make bread on my own. I tried one time since my mother moved and it was a complete mess. So I finally decided that I would try it again...BUT I wanted an easy recipe and of the ladies from the nest were more than happy to share their recipes with me. Thanks bella.in.ct. While my bread didn't come out as beautiful looking as her's It did come out looking nice!
This recipe is from Bella.in.ct food. This is one of the few recipes that I have not made any changes to. Link to her blog is below.
http://bellasbistro.wordpress.com/2009/11/22/my-first-loaf-of-bread/
WHAT YOU WILL NEED:
1/4 teaspoon Active dry yeast (MAKE SURE YOU READ THE PACKET BECAUSE ONE PACKET IS MORE THAT 1/4t)
1 1/2C. Warm water (between 105 and 110 degrees)
3C. All-purpose flour, plus more for dusting.
1 1/2t. Salt
Cornmeal for dusting
WHAT YOU WILL NEED TO DO:
In a large bowl, dissolve yeast in water. Add the flour and salt, stirring until blended.
The dough will be VERY sticky. Cover bowl with plastic wrap.
Let the dough rest for least 8 hours, preferably 12 to 18, (I let it sit for 18 hours and baked it the next day)
Let rest at warm room temperature, about 70 degrees.
The dough is ready when its surface is dotted with bubbles.
Lightly flour a work surface and place dough on it.
Sprinkle it with a little more flour and fold it over on itself once or twice.
Cover loosely with plastic wrap and let it rest for about 15 minutes.
Using just enough flour to keep the dough from sticking to the work surface or to your fingers, gently shape it into a ball.
Generously coat a clean dish towel with flour,and cornmeal.
Put the dough down on the towel and dust with more flour, and cornmeal. Cover with another towel and let rise for about 1 to 2 hours.
When it’s ready, the dough will have doubled in size and will not readily spring back when poked with a finger.
At least 20 minutes before the dough is ready, heat oven to 475 degrees.
Put a 6- to 8-quart heavy covered pot (cast iron, enamel, Pyrex or ceramic) in the oven as it heats. (I DON'T HAVE A DUTCH OVEN SO i USED A PYREX DISH)
When the dough is ready, slide your hand under the towel and turn the dough over into the pot, seam side up.
The dough will lose its shape a bit in the process, but that’s OK. Give the pan a firm shake or two to help distribute the dough evenly, but don’t worry if it’s not perfect; it will straighten out as it bakes.
Cover and bake for 30 minutes.
Remove the lid and bake another 15 to 20 minutes, until the loaf is beautifully browned.
Remove the bread from the Dutch oven and let it cool on a rack for at least 1 hour before slicing.
I can't wait to make this again! It looks amazing!
Saturday, November 7, 2009
Jalapeno Corn Bread
So I'm on a mission of making yummy food that is simple and for the most part quick and easy. This just happens to be something that would go great with chili or any stews on a cold winter day.
Thanks to the JIFFY mixes recipe book for the easy recipe.
2 pkgs. JIFFY corn muffin mix (I know, I know, but it works great when your in a rush)
3 eggs
3/4 cup buttermilk
1/2 cup sour cream (I use fat free)
4 jalapeno seeded and diced
1 chopped onion
3 Tbsp margarine or butter melted
Preheat oven to 400 and grease 13x9 pan
Combine muffin mix, eggs, buttermilk, sour cream, and peppers. Saute onions in margarine until clear. Add to mixture. Pour into greased pan= and lte bak 30-45 minutes.
For best results serve warm.
Thanks to the JIFFY mixes recipe book for the easy recipe.
2 pkgs. JIFFY corn muffin mix (I know, I know, but it works great when your in a rush)
3 eggs
3/4 cup buttermilk
1/2 cup sour cream (I use fat free)
4 jalapeno seeded and diced
1 chopped onion
3 Tbsp margarine or butter melted
Preheat oven to 400 and grease 13x9 pan
Combine muffin mix, eggs, buttermilk, sour cream, and peppers. Saute onions in margarine until clear. Add to mixture. Pour into greased pan= and lte bak 30-45 minutes.
For best results serve warm.
Subscribe to:
Posts (Atom)