Sunday, December 5, 2010

Toddler approved Weight Watcher Blueberry Muffins


The winter months are upon us again, that means longer commutes to work...well if you live in New England you expect to have longer commutes =) With longer commutes it means more time on the road, which means you have to get up earlier...which means you would rather have something that you can just take and eat in the car, or eat once you get to work.

Has you all know by now, I'm always looking for recipes that are lighter, and less fating. Muffins are not an exception I'm always looking do was to make them healthier while still trying to make them taste good. I got this recipe from weight watchers, and I did make a few minor adjusts to this recipe and I'm very happy with the end results. Hope you all like it as much as my toddler and I have.

Happy baking!

WHAT YOU'LL NEED:

2 1/4 cup(s) all-purpose flour,
2 1/2 teaspoons baking powder
3/4 teaspoon salt
1/2 of sugar (I use splenda)
2 large egg whites -- slightly beaten
3/4 cup skim milk
1/3 cup canola oil (I used unsweetened applesauce)
3/4 cup blueberries (I used a little more than 1 cup)
1/2 teaspoon vanilla

Preheat oven to 400 degrees F.

Stir together flour, sugar, baking powder and salt.

Make a well in the center. Set aside.

In a separate bowl, combine the egg, milk, vanilla and applesauce.

Add egg mixture, all at once, to the flour mixture.

Stir until just moistened.

The batter will be lumpy. Stirring all the lumps out will make a tough muffin.

Carefully fold in the blueberries.

Line muffin tin with baking paper cups; fill each 2/3 full.

Bake at 400 degrees F for 20-25 minutes or until golden brown.

Remove from pans.

Calories 158; Fat 6; Fiber 1, 3 Weight Watcher Points

Thanksgiving stuffing 2010


I am always surprised to see how many Foodies are out there. More surprisingly is how many men are foodie as well. As some of you know, I recently changed jobs. I have to admit that the patients I have are too funny and while they are being treated we start talking about currents events. Since Thanksgiving was just a week ago the current event topic of conversations was based on the holidays and where we were going to spend it.

One on my patents is a boy scoots leader (who is actually in the processing of finishing his first cookbook). Every year he does this amazing Thanksgiving fest with his troops for the parents in the middle of the woods. While talking to him, I ended up telling him that I didn't have a good recipe for was stuffing. His response was "I have the most amazing stuffing recipe that I made up, next time I come in I'll bring you the recipe". I not going to lie I was excited to get a new recipe for a side that I haven't had much success with, and from someone who is having his cookbook published was a big deal for me.

The next day when I got to work I started checking my work email, and what's in my inbox but...a new recipe for stuffing. For a minute I wondered how he got my email, then I realized that my work email was on my business cards. Thanksgiving came and I decided that I would give this recipe a try, and I am so happy I did. It came out so good, and even my picky eater mother-in-law liked it.

Thanks Joe for making my Thanksgiving sides a success! FYI this recipe is tailored for a 20 to 25 pound turkey

Recipe source Joe X (sorry no last names due to hippa regulations)

Happy Cooking!


WHAT YOU'LL NEED:

2 lbs. Plain pork sausage browned in olive oil
4 or 5 onions chopped and sautéed
5 celery stalks chopped and sautéed
½ of a fennel bulb chopped and sautéed
½ of a bunch of flat Italian parsley chopped
1 large or 2 small cans of pears in heavy syrup, strained and chopped, discard syrup
2 or 3 fresh apples peeled, cored and chopped
12 ounces of cornbread stuffing
1-14 ounce box of raisins
1-6 ounce package of craisens (dried cranberries)
4 or 6 eggs


WHAT YOU'LL NEED TO DO:

Prepare each of the items as listed.

When everything is done carefully blend all except the eggs in a large bowl and let stand for a couple of hours.

This allows all of the flavors to meld.

Prior baking beat the eggs and carefully blend into the mix.

Put mixture into prepared casserole dish and bake for 30-45 mins until hot.

All that is left to do is enjoy your dinner.

Tuesday, November 30, 2010

Sweet Potato Casserole w/ Marshmallow and Cornflake Topping


I feel like every holiday, my husband likes to add more work to my day. My down fall is I love to cook and try new things so I never say no. This year he asked that I make him a potato casserole. I am not a sweet potato fan so I didn't plan on having it on my meal plan for the day, but since he asked so nicely I couldn't say no.

In my search for the perfect recipe I came across a lot of recipes, but nothing that really make me go that sounds like a great recipe. So I decided that I would take the main ingredients, doctor it up by adding a few ingredients and adding others ingredients so I could tailor it to my husband's likes and dislikes. I also went as far as to change the cooking methods and techniques, I am pleased to say, that I was so happy with the way it came out, and I just had to taste it for myself. Like I said before I am not a fan of sweet potatoes, but this recipe was so good that I actually had a full serving at Thanksgiving.

The fact that I actually enjoyed it means that they recipe had to be pretty amazing. My husband enjoyed it so much that he asked if I could use this recipe on a regular bases. So it appears that it got the seal of approval with the family.

Happy Cooking!

Inspired by the food network kitchen

WHAT YOU'LL NEED:


5 pounds sweet potatoes pealed and cut into large chunks
3 large eggs, lightly beaten
4 tablespoons unsalted butter, melted, plus more for the preparing the pan
4 tablespoons packed dark brown sugar
salt to taste
1 teaspoon ground cinnamon
1 teaspoon ground ginger
1 large pinch of grated nutmeg
Freshly ground black pepper to taste
3/4 heavy cream
about 1 cup of mini Marshmallow
2 cups cornflakes (enough to cover the top of the casserole)

Directions

Preheat the oven to 350 degrees F.

On a large stockpot add water (enough to cover sweet potatoes)

Put the sweet potatoes into boiling water and allow to boil until tender.

Drain from water and set aside to cool.

Scoop the sweet potato into blender and blend until smooth.

Transfer potato puree into a stand mixer and add the eggs, butter, brown sugar, salt, cinnamon, ginger, nutmeg, pepper and heavy cream.

Blend until mixture until smooth.

Butter a casserole dish and pour the sweet potato mixture into the pan.

Then top with a little layer of mini marshmallows, now top that with cornflakes.

Bake until puffed, and cornflakes are browned (about 30 minutes.)

Serve immediately.

Sunday, November 28, 2010

No Bake Ladyfingers Pineapple Cheesecake

If you ask my Husband he will tell you that this is by far the best ladyfingers cheesecake that he has ever had. This recipe is one that my mother would make all the time when I was growing up. When I asked my mother where she got the recipe all she could say is I got it from a family member years ago, and she didn't know where they got it. So unfortunately I can't site it back any further than my mother.

What I can tell you is I have made a few adjustments from how my mother makes it. I hope that you all enjoy this recipe as much as my husband and son do. The look on their faces when I put it on the table on Thanksgiving was priceless. It was the first time I made it and the first time they have had it since my parents moved away almost 23 years ago. I hope you all enjoy this recipe as much as they did.

Happy baking...or in this case happing mixing! And like always if you do make this recipe, I would love to hear your feedback.


WHAT YOU'LL NEED:

3 8oz Packages cream cheese at room temp (I like to use the 1/3 less fat cream cheese)
2 6oz Cartons of heavy cream
1 1/2 Cups of sugar (my mother uses 1 3/4cups) I like to use less because you have the sweetness from the pineapple topping
1 teaspoon of vanilla (like always use the feel good stuff)
2 packages of soft ladyfingers (this could be found at your local store in the bakery section)
1 can of crushed pineapple

WHAT YOU'LL NEED TO DO:

Line the bottom and sides of your spring from.

In your stand mixer add cream cheese, sugar, vanilla. Once combined add in heavy cream and mix for about another 2 minutes until well combined.

At this point you should have a fluffy yet dense mixture (it should not be watery or runny)

Take mixture and pour half into perpared spring form then take remaining ladyfingers and layer over cream cheese mixture.

Once you have layed your ladyfingers, take remaining cream cheese mixture and layer it over the ladyfingers.

Put into the frig for at least 3-4 hours if not over night.

Before serving open can of crushed pineapple and drine juices. Take the drained pineapple and top your cheesecake.

All that is left to do is enjoy!

Sauteed Broccoli Rabe

This is by far the best way I to prepare broccoli rabe. Being that my family isn't the biggest group of corn lovers. I thought that this year for Thanksgiving I would make broccoli rabe. Almost everyone loves fresh in season broccoli rabe so why not pair it with my turkey dinner?

This was super easy and super yummy recipe. Everyone loved it and I had no leftovers which makes me happy. Try this recipe I grantee that you wouldn't be disappointed.


WHAT YOU'LL NEED:

4 bunches (about 1lb each) broccoli rabe with stems trimmed
1/4 cup olive oil
3 garlic cloves, minced
1/2 teaspoon dried crushed red pepper flakes
Salt
Fresh ground pepper
2 tablespoons pine nuts, toasted

WHAT YOU'LL NEED TO DO:

Working in batches, cook the broccoli rabe in a large pot of boiling salted water until crisp tender, about 1 minute per bunch.

Transfer the broccoli rabe to a large bowl of ice water to cool.

Reserve about 1/4 cup of the cooking liquid.

Strain the cooled broccoli rabe and set aside.

Heat the oil in a heavy large skillet over medium heat.

Add the garlic and red pepper flakes, and saute until the garlic is golden, about 1 minute.

Reduce heat to medium-low.

Add the broccoli rabe and toss to coat.

Add the reserved cooking water, and cook until the broccoli rabe is heated through and the stems are tender, about 4 minutes.

Season with salt, fresh pepper to taste.

Just before serving, toss the mixture with the pine nuts.

Bobby Flay's Parker House Rolls


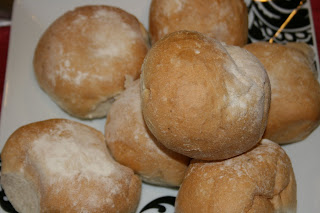
Let me draw you a picture...it's Thanksgiving morning and the bakery that I get my bread from is closed. The nearest bakery that I've used and trust is 20 miles away. We are hosting Thanksgiving and neither my husband or I can afford to spend an hour in the car just to go pick up bread. So the only thing left to do is to try baking my own batch.

We don't really eat much bread with dinner, but since we where having a late dinner, my thought was that late afternoon people might get hungry and want to make some mini sandwiches. So I was left with on other choice but to try to bake my very first dinner roll. Yes, I've made a loaf of bread before, but something about working with yeast is intimidating.

Luckily this recipe was easy enough that the end result was terrific. This will surely be a recipe that I use over and over again, especially when we have dinner guests. Hope you all enjoy them as much as I did.

Happy Baking!

Recipe courtesy Bobby Flay


WHAT YOU'LL NEED:

1 1/2 cups milk
1 stick unsalted butter, cut into pieces, plus more for brushing
1/2 cup sugar
1 package active dry yeast
1/2 cup warm water
3 large eggs, lightly beaten
1 1/2 teaspoons salt
6 cups all-purpose flour

WHAT YOU'LL NEED TO DO:

Place milk in a small saucepan and bring to a simmer.

Remove from the heat, stir in the butter and sugar and let cool.

Dissolve yeast in warm water and let sit until foamy. (about 10-15 minutes)

Combine milk mixture, eggs, yeast, salt, and 1/2 of the flour in a mixer with the dough attachment and mix until smooth.

Add the remaining flour, 1/2 cup at a time, and stir until a smooth ball forms.

Remove from the bowl and knead by hand on a floured surface for about 5 minutes.

Place in greased bowl, cover, and let rise in a warm place until doubled in size. (this will take about an hour)

On a floured surface, punch down the dough and shape into desired shapes.

Place on a parchment paper-lined baking sheet.

Dust rolls with flour and cover again and let rise until doubled, (another 30 to 40 minutes.)

Preheat the oven 350 degrees F.

Bake for about 20 minutes or until golden brown.

Remove from the oven and brush with melted butter before serving.

Wednesday, November 24, 2010

How to Cook a Turkey

I tend to make turkey a few times a year, and it seems that around this time every year I'm asked by someone how to cook a turkey. So I thought that this year I would write a post detailing the process so that people could access it before turkey day, or any other day for that matter.

Cooking a turkey without drying out the white meat is a lot simpler than it seems. One must keep in mind that a turkey takes a long while to cook through to the bone. And it is important to remove it from the oven once it reaches 180 degrees. And finally you have to make sure that you roast the bird at a high enough temperature to keep it safe to eat without overcook it.

Allow about 15 minutes of cooking time per pound and about 20 minutes per pound if the bird is cooked with stuffing. So keep this in mind when planning dinner. Determine what time you would like to have dinner and then work backwards to determine the time the turkey needs to go into the oven.

Preheat oven to 325.

Brine your turkey for 24 hours to insure a tender, juicy bird. (Brine recipe to follow in Thanksgiving post)

Place turkey breast side up on a rack in a shallow roasting pan.

Insert meat thermometer in thigh. Add just enough water to over the bottom of pan, (I tend to use the liquid from the brine.)

Cover turkey loosely with a tent of heavy-duty aluminum foil.

Roast the turkey until temperature in the thickest part of the thigh reaches 180°F.

Cooking time will vary. For example, a 20 pound turkey will take 4 1/4 to 5 hours to cook, check the temperature on the thermometer after 4 hours.

Remove the foil tent after 1 to 1 1/2 hours of cooking time to brown the skin.

Brush with vegetable oil or maple syrup to enhance browning

A whole turkey is done when the temperature reaches 180°F.

Do make sure that you don't overcook your turkey you must remove it from the oven once it reaches 180 degrees. Let it rest for about 20 minutes while you get the rest of dinner ready to serve. Once 20 minutes have passed you are able to crave the turkey.

Once it reaches this temperature the thigh juices should run clear when pierced with a fork and the leg should move freely.

It's that simple. Just follow the above steps and you too will have a fully cooked, tender juicy turkey!

Happy Cooking!