My food blog is about the foods that I actually make for my family. My schedule is so crazy that I tend to turn meals that are easy for an active family, all while trying to make healthy choices. And of course you will find an occasional not so healthy meals, or treats but like they say..."everything in moderation!"
Wednesday, April 28, 2010
Bacalhau (salted cod) with Smashed Red Potatoes (Bacalhau com batatas a murro)
What can I say to describe how wonderful this dish is? Honestly it's such a healthy simple dish that it amazes me how fast and easy it all come together. I try to incorporate fish into our weekly meal plan at least twice a week...does it always happen...no, but I do tend to make salted cod twice a month.
I have been meaning to blog about this recipe for months now...but every time I make it we never seem to have any leftovers, however this time I told my husband he had to wait for his dinner until I took a picture. I hope you all enjoy it as much as we do. Happy cooking!
Yields 3-4 servings....
WHAT YOU'LL NEED:
1-1.5 lbs of salted cod...(per-soaked fir at least 24 hours changing the water at least 3 times)
6-8 medium red potatoes scrubbed
3 cloves of garlic minced
5 tablespoons of olive oil ( use the good stuff it make a huge difference)
3 tablespoons of red wine vinegar
salt and fresh ground pepper to taste
WHAT YOU'LL NEED TO DO:
Preheat oven to 450
scrub potatoes will and season with a little of salt and pepper. place potatoes on cookie sheet and bake until they become tender...(medium size potatoes will take about 30 minutes on 450)
While the potatoes are baking season salted cod with some pepper and grill on low. The time for this will vary based upon the thickness of your salted) Dish is cooked when fish begins to flake...(1-1.5 inch thickness should talk about 10 minutes on each side for a total of 20 minutes cooking time)
In a small bowl combine olive oil, garlic, and red wine vinegar mix together until well combined.
Once potatoes are done cooking place on serving dish and smash the potatoes with hand.
Once fish is fully cooked let sit for about 3-4 minutes to cool slightly, and then using your hands or fork...flake fish into bite size chunks.
Drizzle the garlic/vinegar/olive oil "dressing" over everything and mix together.
Friday, April 23, 2010
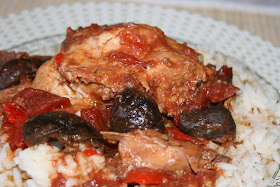
Weight Watchers Chicken Cacciatore in the Crock-pot
Some people have the notation that if it's good for you, or if it's a diet/low calorie recipe then it has to taste bad. People think that just because it's weight watchers it has to taste like cardboard, or have no taste at all. This recipe is none of them, in fact it's a amazing recipe and I can't wait to make it again.
This recipe was meant to be made on the stove top, however I adapted it to work in the crock-pot. I hope you all enjoy it as much as I have. Happy cooking!
WHAT YOUR GOING TO NEED
1/4 cup flour
Salt and pepper to taste
8 chicken legs (I use breast meat)
1 tablespoon olive oil
3 garlic cloves, chopped (I like to use more)
1 large onion, chopped (about 2 cups)
1 red pepper, chopped
8 ounces fresh mushrooms, quartered
24 ounces canned diced tomatoes 16 ounces tomato sauce
1 cup dry red wine (optional)
2 tablespoons brown sugar
1 teaspoon Italian seasoning
1/2 teaspoon onion powder
1/2 teaspoon oregano
WHAT YOUR GOING TO NEED TO DO:
Combine the flour, salt and pepper in a large dish.
Roll the chicken pieces in the flour until lightly coated.
Heat a large Dutch oven on medium high. Add the olive oil and lightly brown the chicken on all sides.
Set the chicken in crock-pot and add the garlic, onion, red pepper and mushroom.
Cook on low for 8 hours.
NUTRITION ESTIMATE 189Cal; 11g Protein; 6g Tot Fat; 1g Sat Fat; 19g Carb; 3g Fiber; 666mg Sodium; 36mg Cholesterol; Weight Watchers 4 points
Tuesday, April 13, 2010
Whole Wheat Pizza Dough
Store bought pizza dough is always great for last minute, but I think that if you're taking the time to make homemade pizza, then you should also try to make the dough. It's really not hard and it doesn't take much time.
Not only is this recipe healthier because it's make with whole wheat, but I actually think that this dough is a million time better than the store bought one. Truthfully I think that you should try to make your own pizza dough at least once.
Happy Baking!
Recipe yields one pizza crust. I wish I could site the source of this recipe, but to be honest I've been using it for years now, and for the life of me I can't remember where I got it from. So sorry I can't link it to the cite for you today.
WHAT YOU WILL NEED:
1 (.25 ounce) package active dry yeast
1 cup warm water
2 cups whole wheat flour
1/4 cup wheat germ
1 teaspoon salt
1 tablespoon honey
WHAT YOU WILL NEED TO DO:
Preheat oven to 350 degrees F
In a small bowl, dissolve yeast in warm water. Let stand until creamy, about 10 minutes.
In a large bowl combine flour, wheat germ and salt. Make a well in the middle and add honey and yeast mixture.
Stir well to combine. Cover and set in a warm place to rise for a few minutes.
Roll dough on a floured pizza pan (I like to use a pampered chef pizza stone.)
Poke a few holes in dough using a fork.
Top with your favorite toppings and then bake in preheated oven for about 20-25 depending on how crispy you want your crust .
Nutritional Information per serving (just for pizza dough) Calories: 83, Total Fat: 0.6g, Cholesterol 0mg
Sunday, April 11, 2010
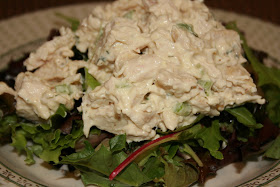
Traditional Chicken Salad
The other day I took out a few chicken breast for dinner, unfortunately my son ended up getting sick with the stomach bug, and my in-laws decided that they would come up to help take care of him. When my father-in-law comes to town he always cooks, (which I love, because he can really cook.) The only thing is he doesn't really cook much with chicken.
Long story short my chicken ended up sitting in the frig for a few extra days, and to avoid it from going bad I ended up poaching the chicken to make chicken soup for my son for the week, and the extra chicken I used to make some chicken salad. Totally different from what I had originally planned. However, I must say that this recipe was really good and was a great way of using up leftover chicken. The best part about it is that both my husband and son loved it.
Recipe adapted from the Food Network link below
http://www.foodnetwork.com/recipes/food-network-kitchens/chicken-salad-recipe/index.html
WHAT YOU'LL NEED:
4 cups diced cooked chicken
1 stalk celery, finely diced
4 scallions, trimmed and thinly sliced
1 1/2 teaspoons finely chopped fresh dill
1 cup prepared mayonnaise (I like to use the reduced fat/lite mayo)
2 teaspoons strained freshly squeezed lemon juice
1 teaspoon Dijon mustard
2 teaspoons kosher salt
Freshly ground black pepper
WHAT YOU'LL NEED TO DO:
In a mixing bowl, toss together the chicken, celery, scallions and herbs. Set aside.
In another bowl, whisk together the mayonnaise, lemon juice, mustard, salt and pepper.
Add to the chicken and mix gently until combined. Refrigerate until ready to serve.
So simple, yet so good! Enjoy!
Friday, April 9, 2010
Roasted Vegetables
I have to say that when I was younger I never eat enough vegetables. In fact, I think that the only veggie that I did eat was carrots and cabbage. I kinda blame my parents for that, had they "made" me eat my veggies when I was younger, I don't be trying to "learn" to eat them now.
Long story short, this recipe and method of making veggies has made getting my daily intake of veggies much easier. I don't think I'll ever go back to just steaming veggies, even more so, seeing how easy it is to make, and how it pairs up well with any main dish.
WHAT YOU WILL NEED:
5 carrots, peeled, cut into thirds
3 medium turnips, peeled and cut into 6 wedges
2 medium red onions, peeled, cut into 6 wedges
1 small head of cauliflower
1.5 lbs of broccoli
5 tablespoons olive oil
1 tablespoon chopped fresh thyme leaves
2 teaspoons kosher salt
Fresh ground black pepper
WHAT YOU WILL NEED TO DO:
Preheat the oven to 350 degrees F.
Put the carrots, turnips, onions, red peppers, cauliflower, and broccoli, on a baking sheet and toss with the olive oil, thyme, salt, and pepper.
Roast for the last hour, stirring occasionally, until tender throughout.
Baked Shrimp Scampi
So for Easter I wanted to make something different with shrimp. My guests and I were lucky enough that Tara shared her baked shrimp scampi recipe with me.
This recipe is so good that I really didn't make many changes to it, (besides cutting back on the amount of butter.) aside from that I kept the recipe the same. I can't wait to make this again soon.
Thanks again Tara for sharing the recipe!
Recipe source http://smellslikehome.wordpress.com/2010/02/25/bb-baked-shrimp-scampi/
WHAT YOU WILL NEED:
2 pounds (12 to 15 per pound) shrimp in the shell
3 tablespoons good olive oil
2 tablespoons dry white wine
Kosher salt
Fresh ground black pepper
12 tablespoons (1 1/2 sticks) unsalted butter, at room temperature (I personally found this to be a lot of butter, so I cut it back to 8 tablespoons and it still came out amazing)
4 teaspoons minced garlic... 4 large cloves
1/4 cup minced shallots (I omitted this because I didn't have any that day)
3 tablespoons minced fresh parsley leaves
1 teaspoon minced fresh rosemary leaves
1/4 teaspoon crushed red pepper flakes
1 teaspoon grated lemon zest
2 tablespoons freshly squeezed lemon juice
1 extra-large egg yolk
2/3 cup panko bread crumbs
Lemon wedges, for serving
WHAT YOU WILL NEED TO DO:
Preheat the oven to 425 degrees.
Peel shrimp leaving the tails on, and devein the shrimp.
Place the shrimp in a mixing bowl and toss with the olive oil, wine, 2 teaspoons salt, and 1 teaspoon pepper.
Allow to sit at room temperature while you make the butter and garlic mixture.
In a small bowl, mash the softened butter with the garlic, parsley, rosemary, red pepper flakes, lemon zest, lemon juice, egg yolk, panko, 1/2 teaspoon salt, and 1/4 teaspoon of pepper until combined.
Starting from the outer edge of a 14-inch dish, arrange the shrimp in a single layer cut side down with the tails curling up and towards the center of the dish.
Pour the remaining marinade over the shrimp.
Spread the butter mixture evenly over the shrimp. Bake for 10 to 12 minutes
Serve with lemon wedges.
Sunday, April 4, 2010
Tyler Florence's Roasted Prime Rib with Horseradish Crust
All I'm going to say is OMG!!! This was an amazing dish and I could have not asked for a better main course for my Easter lunch. My guests all loved it. Just like all of Tyler Florence's ultimate dishes this recipe is a keeper. I did make a few minor changes example cutting back on the salt for the crust...I think that using the whole amount makes the roast salty, aside from that this is an outstanding recipe.
Source http://www.foodnetwork.com/recipes/tyler-florence/roast-prime-rib-of-beef-with-horseradish-crust-recipe
WHAT YOU WILL NEED:
1 bone in prime rib beef roast, 5 ribs, about 9 pounds
5 garlic cloves, smashed
1/4 cup grated fresh or prepared horseradish
Leaves from 2 fresh rosemary sprigs
Leaves from 4 fresh thyme sprigs (I only use 1 spring because we don't really care for thyme)
1/2 cup kosher salt (I only use 1/3 cup of salt because more will make the meat too salty)
1/4 cup freshly ground black pepper (you can also use a few tablespoons of ground pepper ant then use peppercorns for the rest
1/2 cup extra-virgin olive oil
1/2 cup dry white wine
1 tablespoon all-purpose flour
2 cups canned chicken or beef broth
WHAT YOU WILL NEED TO DO:
In a small bowl mash together the garlic, horseradish, rosemary, thyme, salt, pepper, and olive oil to make a paste. Massage the paste generously over the entire roast.
Refrigerate over night and then take meat out of refrigerator let set at room temperature for 30 minutes.
Preheat oven to 400 degrees.
Lay the beef in a large roasting pan with the bone side down. (The ribs act as a natural roasting rack.)
Put the pan in the oven and roast the beef until the internal temperature of the meat registers 125 degrees F on an instant-read thermometer (medium-rare),2 2.5 hours.
I prefer my Prime Rib a little more well cooked (medium) so allowed my Rib roast to reach 140 degrees F and that took about 3-3.5 hours.
Once desired meat temperature is reached, remove the beef to a carving board and let it rest for 20 minutes before carving.
Pour off some of the pan drippings and place pan on stovetop over medium-high heat.
Add the white wine and bring to a simmer, scraping the bits on the bottom of the pan.
Reduce the wine by half. Whisk in the flour, then add the broth and continue to cook, whisking until sauce thickens into a gravy, about 10 minutes.
I will admit I did not make that sauce, because the meat was so juicy, therefore it did not require and additional sauces.
Peanut Butter Bon-Bons
I have never made truffles before and when I came upon this recipe I decided that I would make them for Easter. if YOU LOVE reese's peanut butter cups, then this is the recipe for you.
This recipe was so easy and took almost no time to put together. I made so many that I have about 50 extra that I plan on taking into work.
This recipe yields about 100 truffles so it's perfect for a large gathering. I hope you all enjoy them.
Recipe source http://allrecipes.com/Recipe/Peanut-Butter-Bon-Bons/Detail.aspx
WHAT YOU WILL NEED:
2 cups peanut butter
3/4 cup butter
4 1/2 cups confectioners' sugar
3 cups crispy rice cereal
6 (1 ounce) squares semisweet chocolate, chopped
WHAT YOU WILL NEED TO DO:
In a medium saucepan, melt together the peanut butter and butter, stirring occasionally until warm and smooth.
In a large bowl, stir together the confectioners' sugar and rice cereal; pour the peanut butter mixture over the cereal mixture and use your hands to blend well.
Roll tablespoonfuls of the mixture into balls and chill.
In the microwave melt chocolate chips, stirring frequently until smooth.
Dip the peanut butter balls into the chocolate using a toothpick. Place onto waxed paper to set.
Nutritional Information open nutritional information Calories: 76 Total Fat: 4.6g Cholesterol: 4mg